Assigning a QR Code via the Service app
Before you can begin assigning QR codes, you’ll first need to enable the feature in your Company Settings. Once active, you can then designate which technicians have permission to assign QRs to equipment by updating their profiles in Admin > Users.
Company Settings
Your company must first allow technicians the ability to scan equipment QR Codes. This can be found in HQ>Company Settings>Service Settings. NOTE: Only HQ users with the role Account Owner can configure this setting.
1. At the top right corner click on your name then select Company Settings.

2. Click on Service Settings located in the Menu on the left side of the screen.
- Next, scroll down to Technician Capability & toggle ON the setting: Scan equipment QR Codes which will allow technicians to scan equipment QR codes.
- Click Save at the bottom of the screen.

Technician Capability
Once the feature is active in Company Settings, you’ll need to grant individual permissions to your chosen technicians. Under the user profile, simply authorize them to assign equipment to QR codes.
1. Navigate HQ>Admin>Users.

2. Search for the respective technician’s name, then click the 3 dots icon to the right and select Edit.

3. Within the Technician Capability card, Enable Assign Equipment QR Codes, then click Save at the bottom of the screen.

Assign QR Codes to Equipment
QR Code Implementation
Put a process together on how you will assign QR Codes to equipment and attach the QR Code Card to the equipment that best fits your facility’s resources.
- Where are you going to place the QR Code Card on the equipment?
- Are you going to have your technicians assign each QR Code and place them on the equipment? Or, will you have a back office person assign the QR Code Card and write the equipment ID on the back of the QR Code Card, then have the technician place them on the equipment?
The best practice is to give the technician a stack of QR Codes and have them go to customer's site to affix the QR sticker and assign to the equipment. A QR Code can be assigned two ways in the Service app.
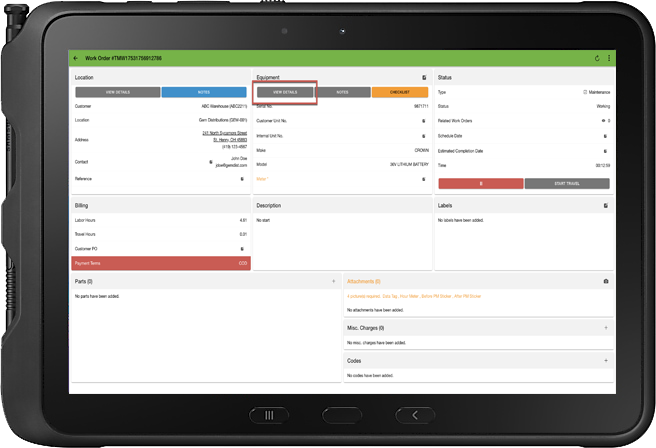
Work Order Details
- Affix the QR Code onto the equipment.
-
Within the Work Order Details scree, press [View Details] in the Equipment card.
-
In the Actions card, press Assign QR Code.

-
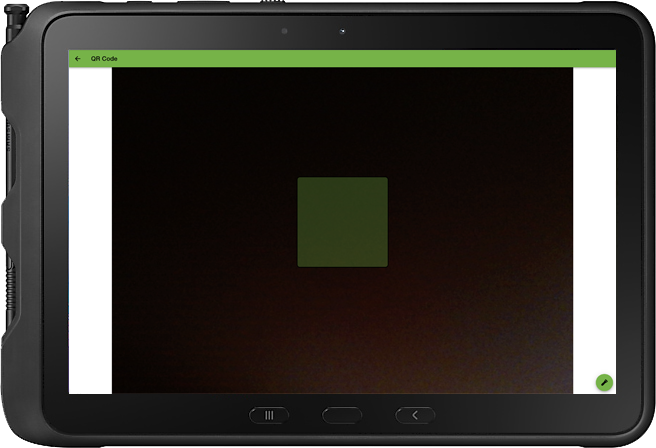
Aim the camera to center the QR Code within the square, once the code is successfully scanned the equipment will be assigned.


From The Home Screen
- Affix the QR Code onto the equipment.
-
From the HOME screen press the QR Scan Code icon at the top, right corner.

- Press [Start Scan].


4. Using the camera, scan the QR Code. Click the pencil icon to select the respective Location, select the respective equipment serial number and then press [Select]. The QR Code is now assigned to the equipment. NOTE: If you chose to have a back office person assign the QR Code prior to placing the QR Code Card on the equipment, remember to write the equipment’s serial number on the back of the QR Code card to ensure that the appropriate card is placed on the corresponding equipment.

Equipment Assigned a QR Code
Equipment Table
Once a piece of equipment is assigned to a QR Code, users can view the equipment that is assigned to a QR Code in HQ.
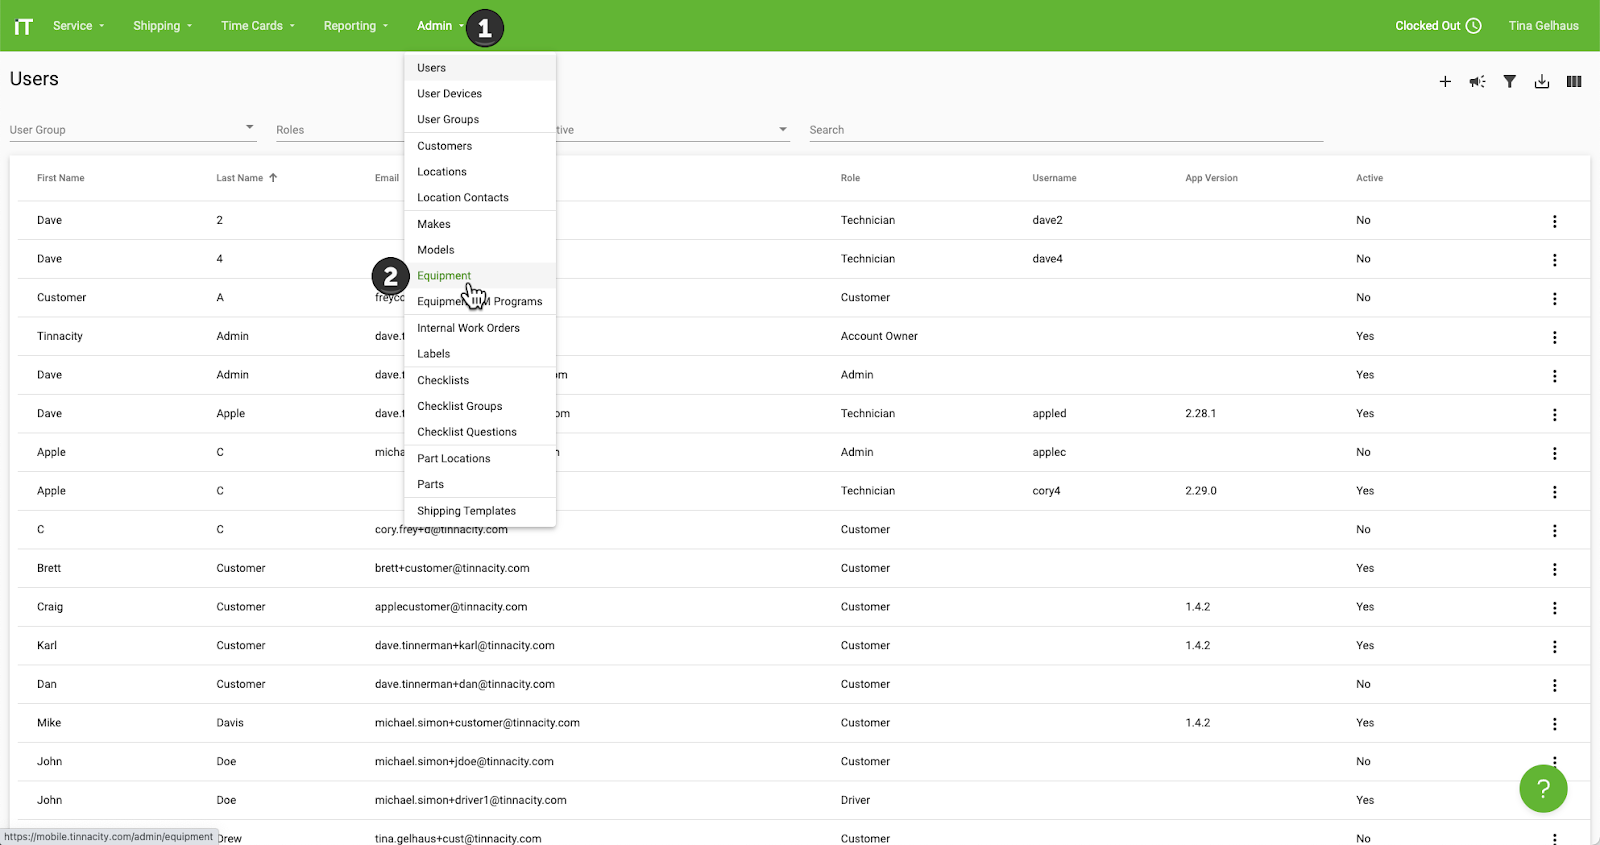
1) In HQ, go to Admin> Equipment. 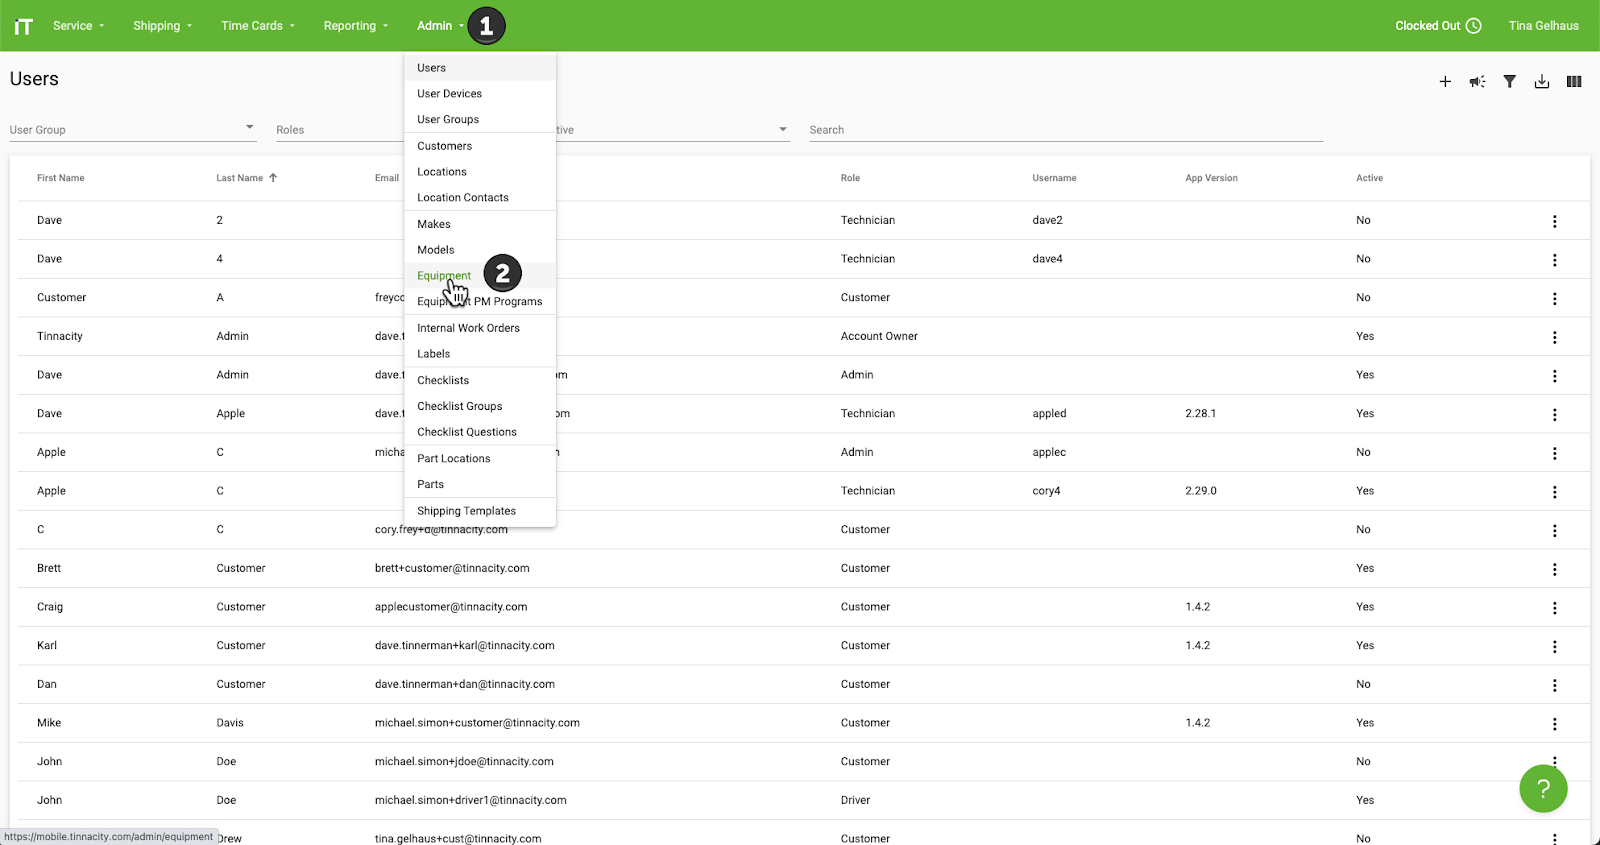
2. Select the respective Location Name & utilize any other filters needed to locate the equipment. The equipment that is assigned to a QR code will have a QR Code icon displayed if one is assigned. TIP: In order to view this, enable the QR Code column for the table.

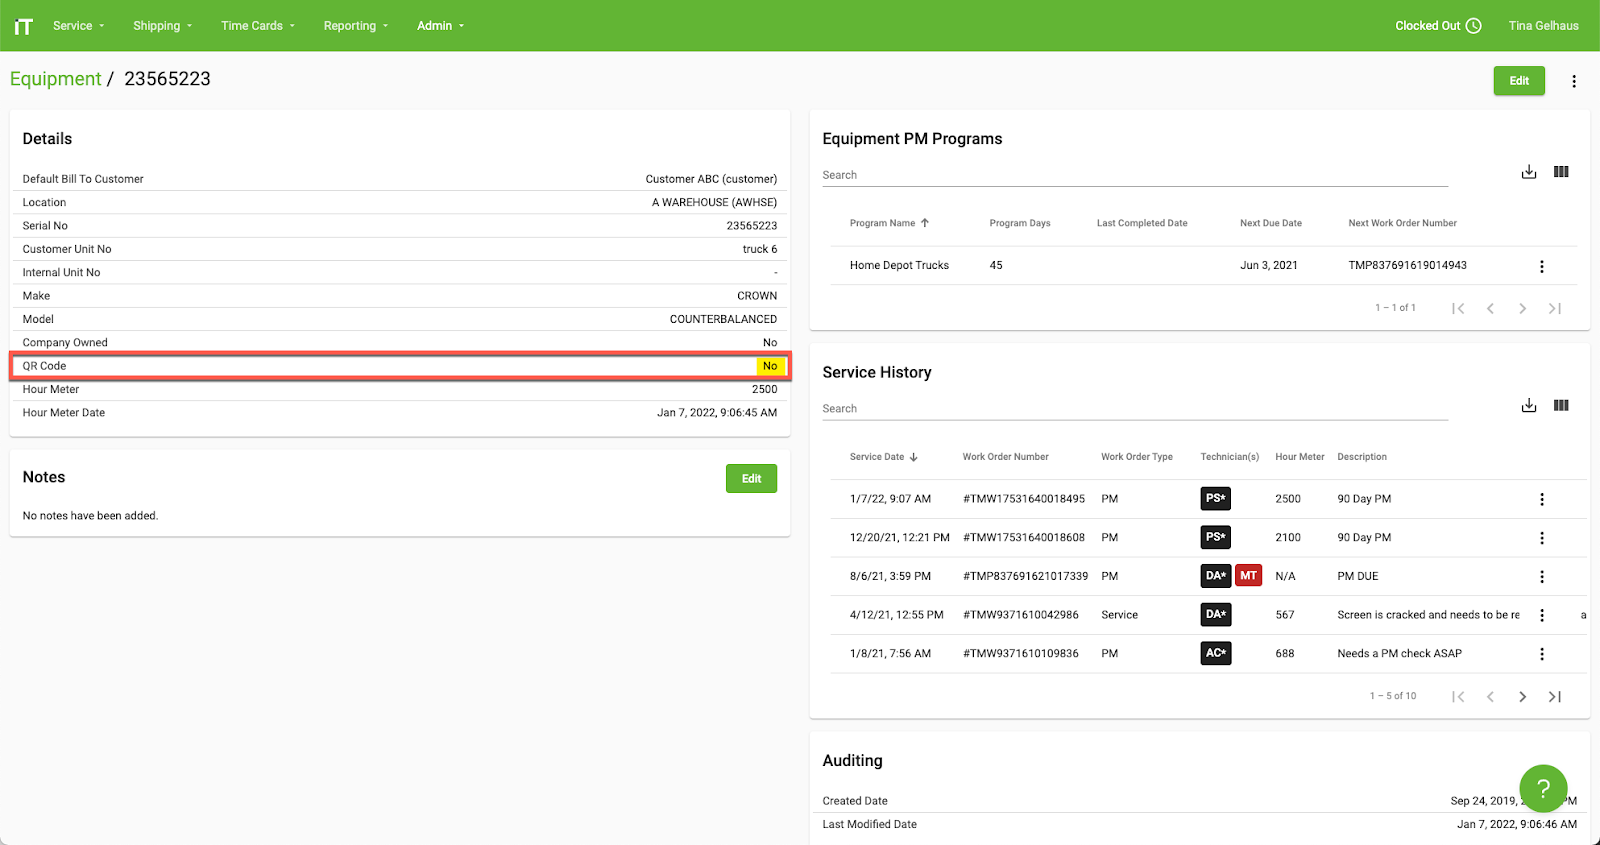
Equipment Details
Users can also search if a piece of equipment is assigned to a QR Code by going to the equipment details.
1. In HQ, go to Admin, Equipment.
2. Locate the respective equipment serial number, click the three dots on the right adjacent from the equipment and then select Details.

Unassign QR Codes
There are times that a QR Code Card gets lost or a piece of equipment is removed from the current location and you need to unassign the current QR Code.
Unassign a QR Code
1. To unassign a QR Code, from the tablet log into the Service app with a technician’s login that has permissions to perform QR scans.
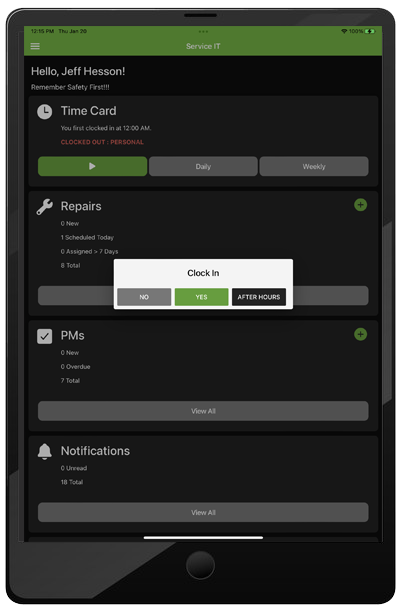
2. Select the QR Code icon in the top right of the Home Screen

3. Press [Start Scan]

4. Using the tablet’s camera, scan the QR Code on the card.

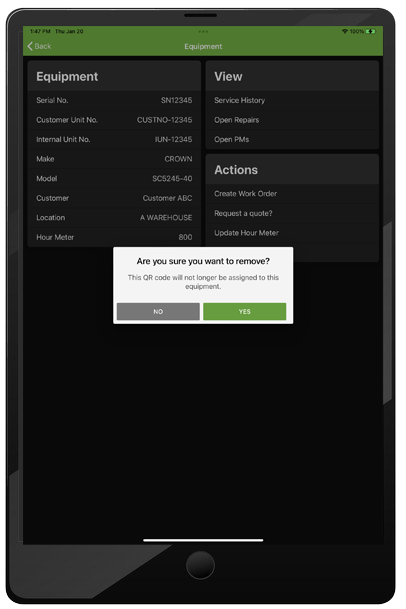
5. The equipment details are now on display, press Remove QR Code.

7. To continue, press Yes. To cancel, press No.
QR Code Features
Using QR Codes enables several features within the Service app. NOTE: If you utilize Tinnacity's Customer Portal for your customers, they can scan these QR Codes as well. Click here to learn more.
Equipment QR Scan
When you scan the equipment’s QR Code Card, the equipment details are displayed along with the additional features:
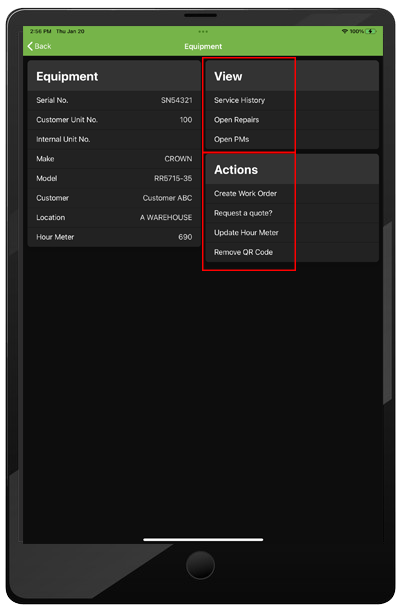
View
- Service History
- Open Repairs
- Open PMs
Actions
- Create Work Order
- Request a quote
- Update Hour Meter
- Remove QR Code