Part Requests Process-Service App
If a technician purchased a part, needs a part, wants to restock a part or used a part - these will display in HQ within Parts Requests. The parts department can then assign the request to themselves or others to fulfill that request. TIP: For purchased parts, we highly recommend when using the parts request to enter in the details needed and take a picture of the receipt. This allows the parts department to add the part from the back end and charge a price of their choice.
To request a part(s) within the Service app, follow the below steps:
-
To initiate a part request from the work order details screen, select the three dots in the top-right corner and choose Part Request, or tap the + icon within the parts card. In this example, we’ll use the + icon option.

-
From the parts list, press [Part Request]. NOTE: If the technician has multiple part locations assigned, they will need to select the appropriate part location first.

- Choose the Part Request Type based on who will be acquiring the part. The part request type chosen dictates what fields the technician will be required to fill out.
- General Request: The part will be purchased by the Parts Department.
-
In-Field Purchase: The technician will purchase the part directly from a vendor


In-Field Purchase
-
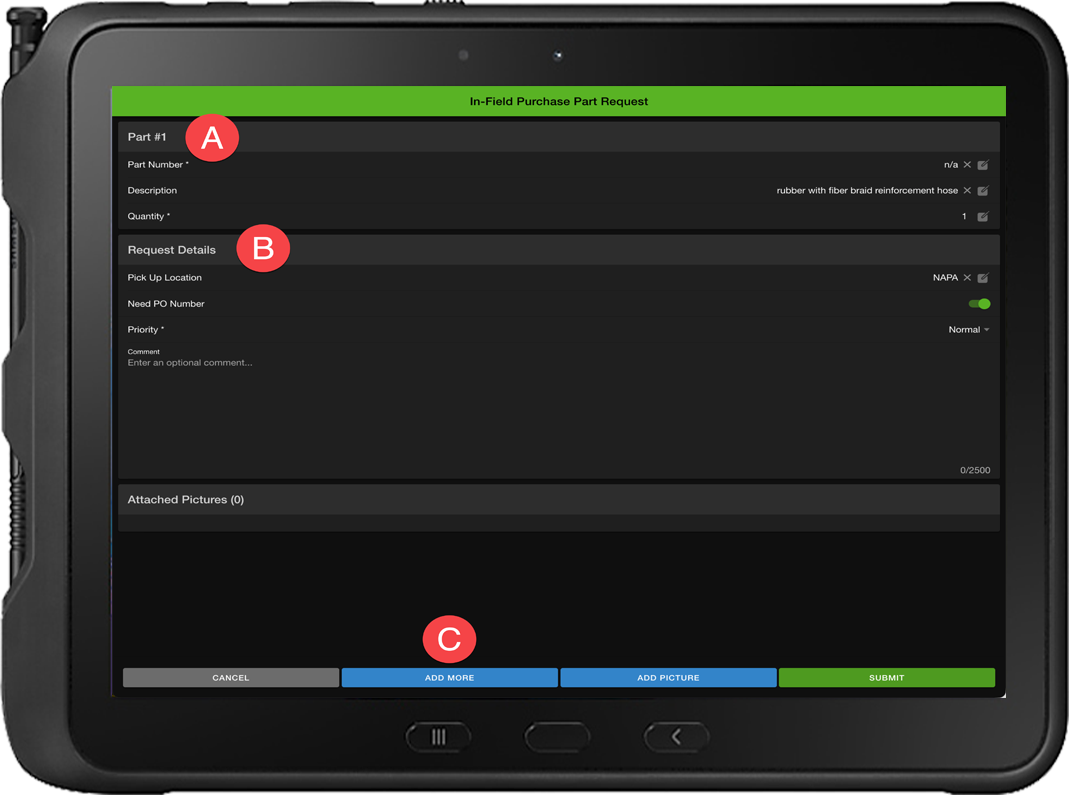
Continuing from Step 3 in Part Request Process above, the In-Field Purchase Part Request form is now displayed. Note: Fields marked with an * are required.
A) Part #1: Enter the part number, description, and quantity. If the part number is not known, enter N/A or Unknown. Tip: Use the magnifying glass to search for a part from assigned locations.
B) Request Details: Enter the Vendor the part is being purchased from, toggle 'Need PO Number' on if a PO is needed, Priority is set to Normal by default. Comment field, enter any additional information the back-office may need to generate the PO.
C) Attached Pictures: Select Add Picture to attach images. Once added, attachments can be managed in this section. Note: If Company Settings > Service Settings > Part Request Settings specifies a required picture count, the technician must add at least that many images. Tip: To request additional parts, click Add More.
General
-
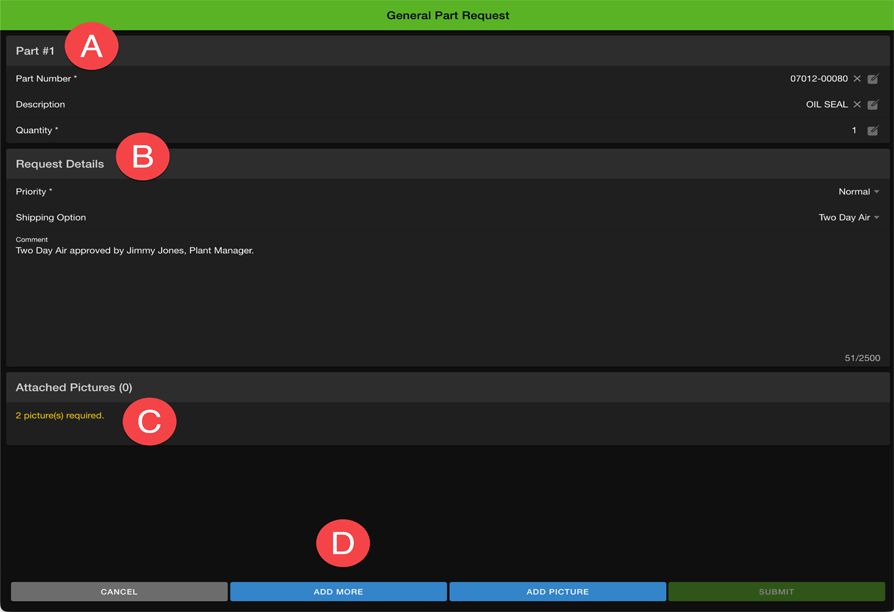
Continuing from Step 3 in Part Request Process above, the General Part Request form is now displayed. Note: Fields marked with an * are required.
A) Part #1: Enter the part number, description, and quantity. If the part number is not known, enter N/A or Unknown. Tip: Use the magnifying glass to search for a part from assigned locations.
B) Request Details: By default, the Priority is Normal. Select the required Shipping Option (Stock Part-No Shipping Needed, Ground, Two Day Air, or Next Day Air). Use the Comment field for procurement notes. Crucially, if you select Two Day Air or Next Day Air, you must include the contact name of the person who approved the cost of expedited shipping.
C) Attached Pictures: Select Add Picture to attach images. Once added, attachments can be managed in this section. Note: If Company Settings > Service Settings > Part Request Settings specifies a required picture count, the technician must add at least that many images. Tip: To request additional parts, click Add More.