Creating a Work Order
While HQ & the Service app will integrate with ERP business systems, it is also built to be stand alone and operate without a connection needed to a business system allowing work orders to be created for dispatch to the Service app from the HQ Dispatch board.
To create a work order:
- Navigate HQ>Service>Dispatch

- Select the create [+] icon in the top right of the dispatch screen.

-
The work order create screen is now on display.
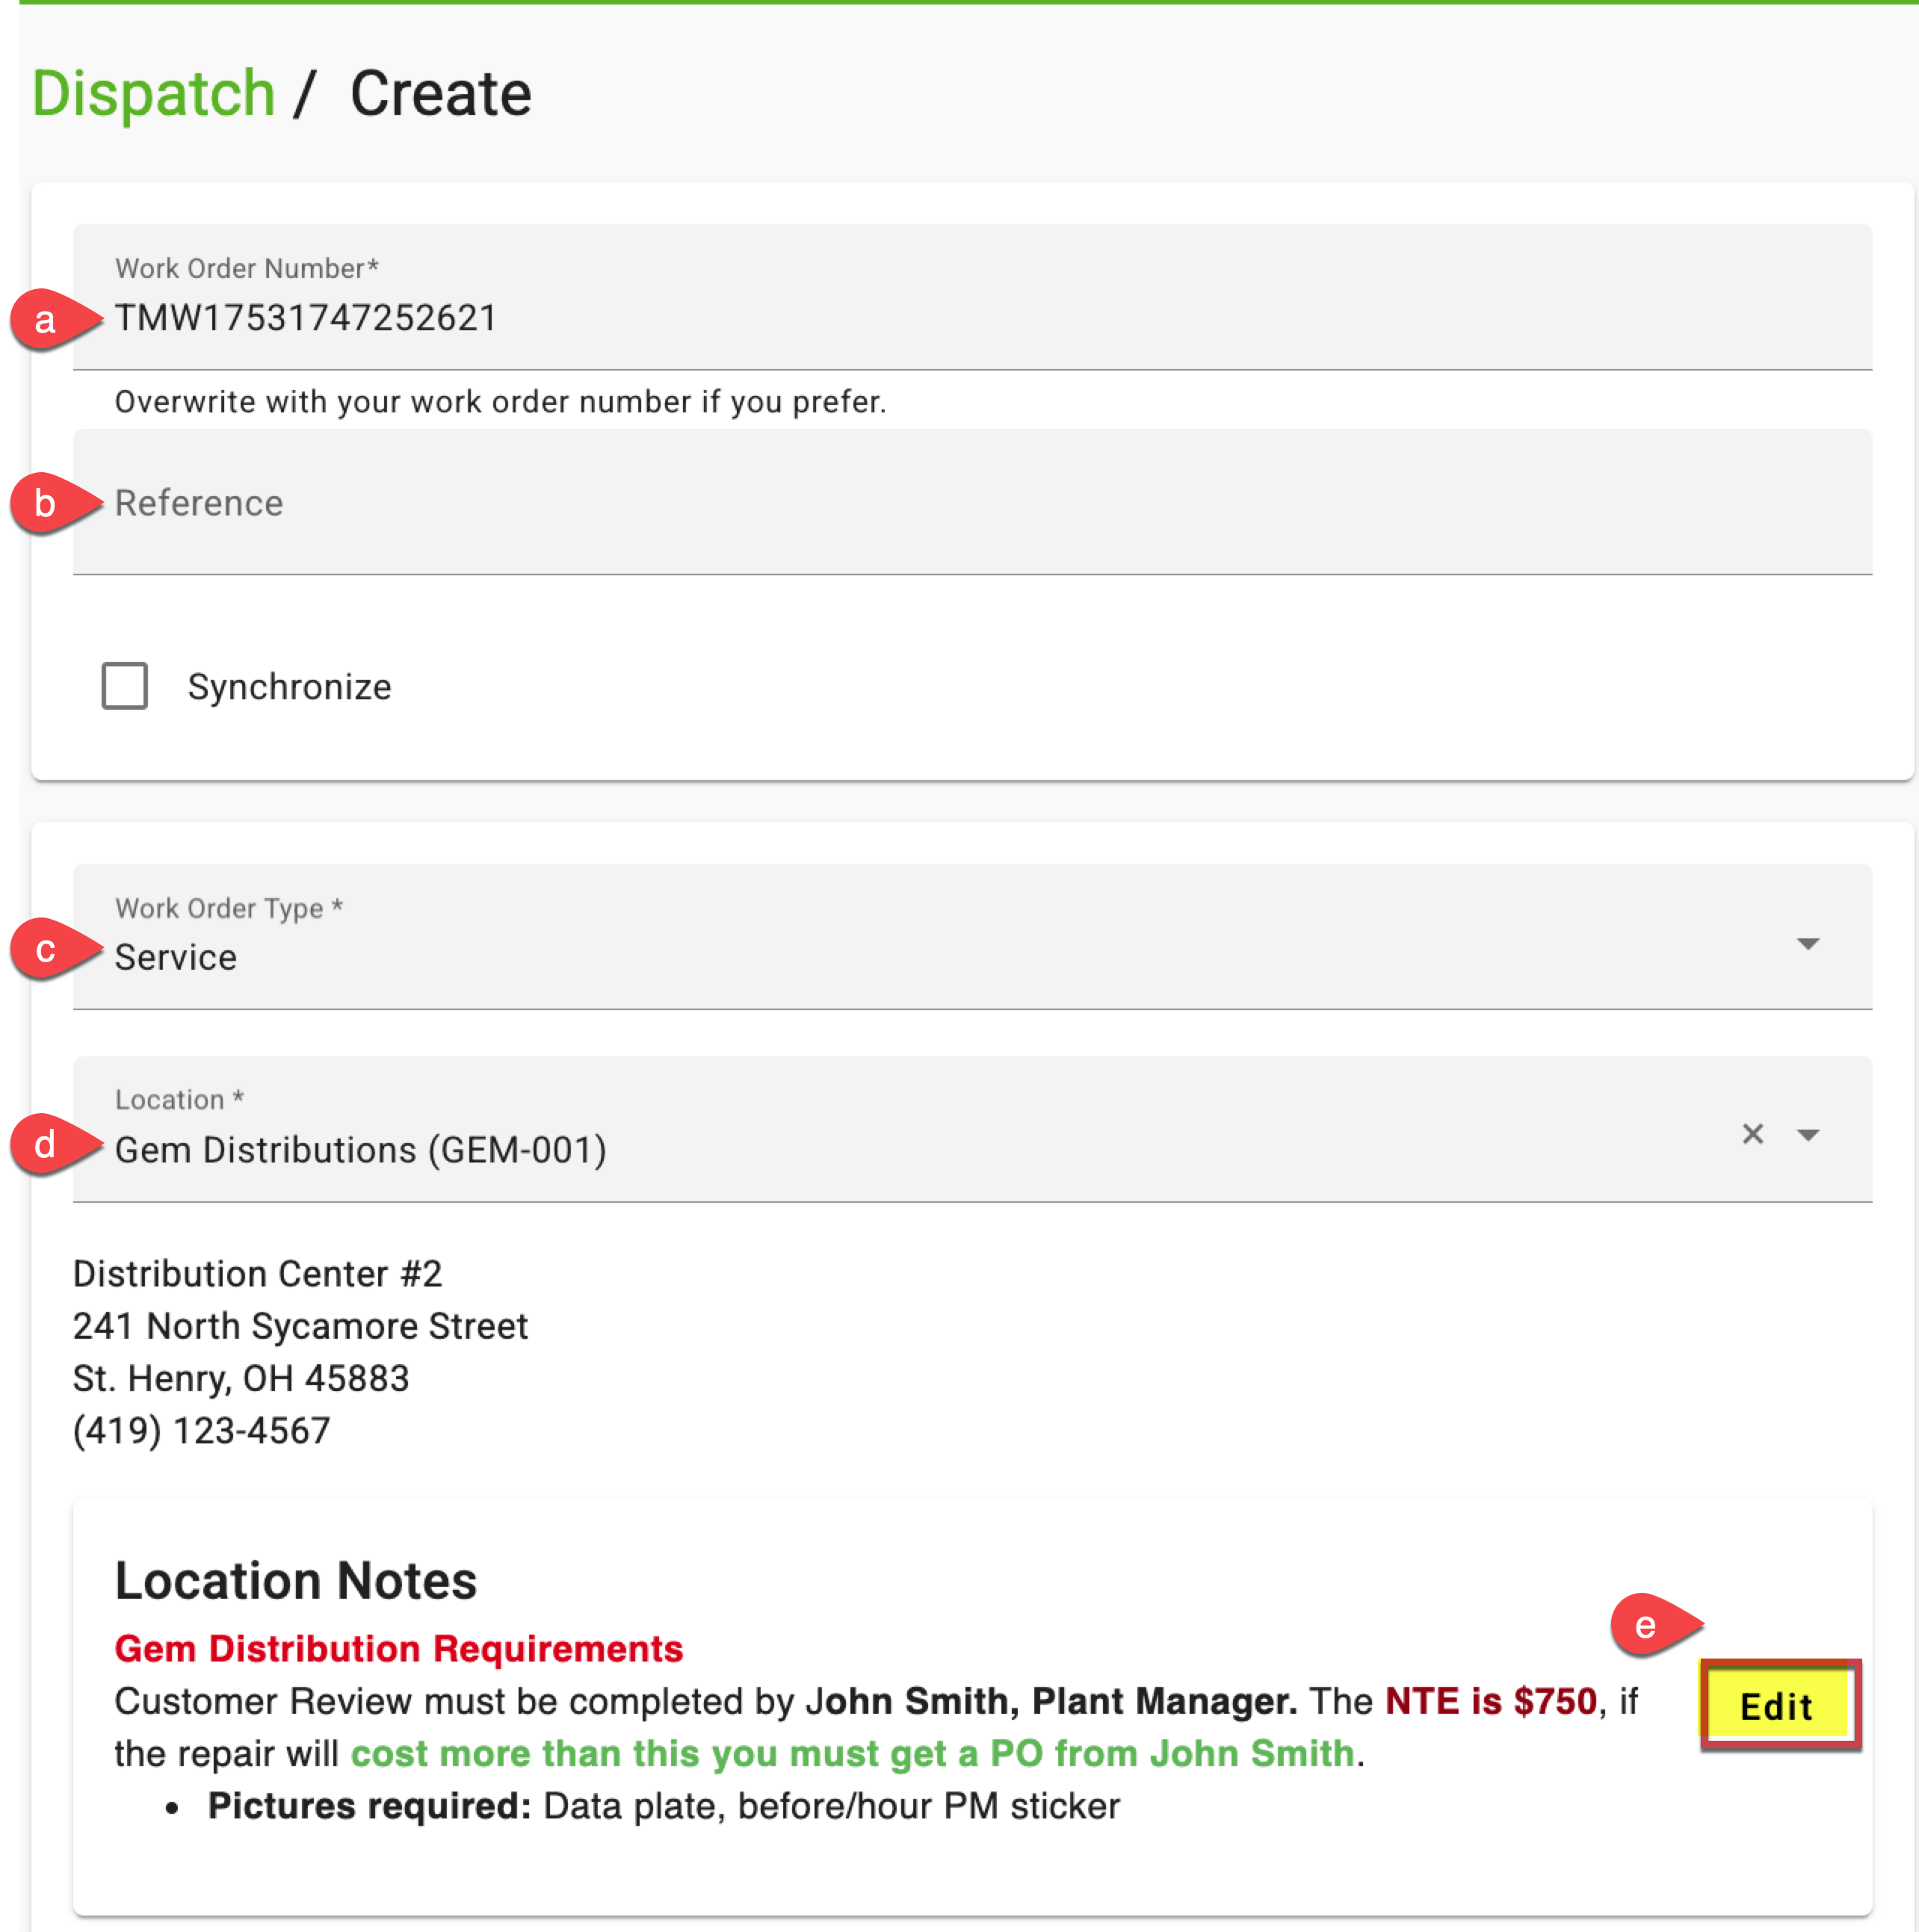
- Work Order Number: By default, the work order number auto populates. This can be changed, but it must be a unique number.
- Reference: If applicable, enter the Reference information.
- Work Order Type: Select the work order type. The work order type's settings in Admin>Work Order Types will be used (i.e., mins/max rounding rules, picture count, work performed notes required, etc.)
- Location: Select the location where the equipment resides.
-
Location Notes: If the relevant location has locations notes, they will be displayed and can be modified by clicking the [Edit] button. TIP: Location Notes can be added in Admin>Locations. Click here to learn more about Location Notes.
-
Continue by entering Contact information, equipments serial number, equipment operational etc.
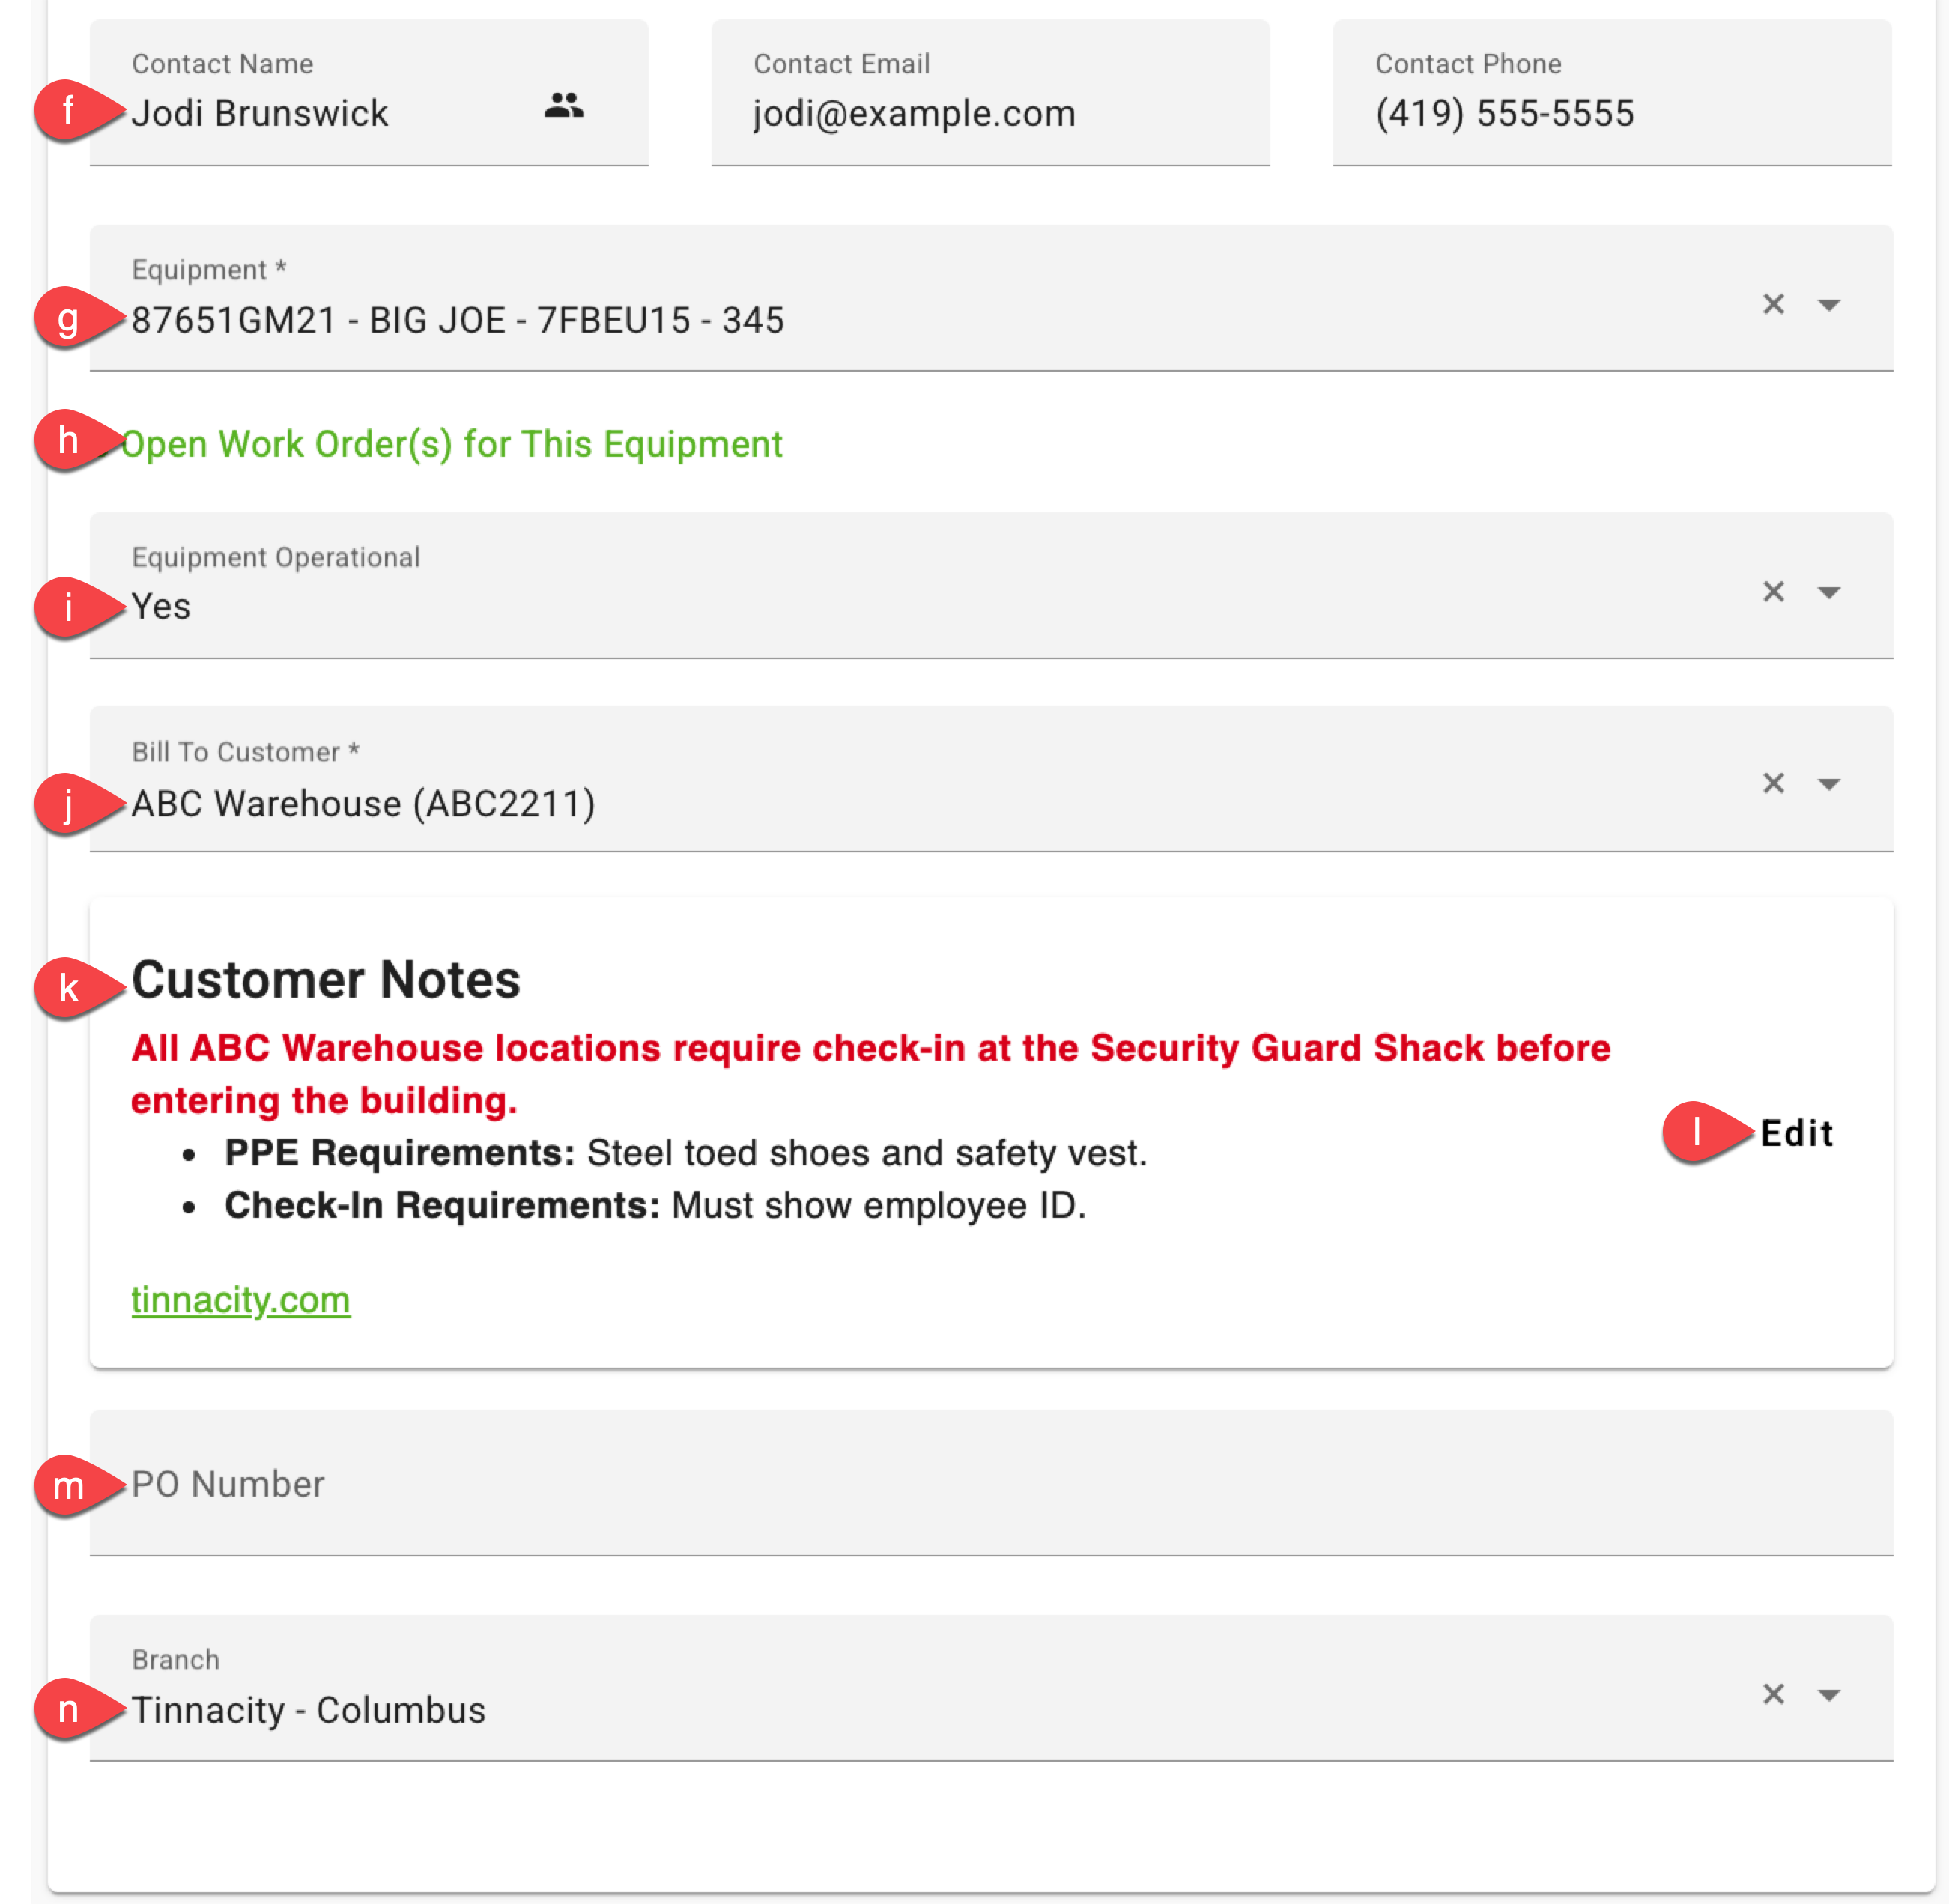


f. Contact Name/Email/Phone: Enter the contact information, or use the 'Contact' icon to create a new contact or select a contact from the available list. Click here to learn more about Location Contact.
g. Equipment: Select the equipment from the available list, this list populates with all available equipment for this location in Admin>Equipment. NOTE: This field can be searched by internal unit number as well.
h. Open Work Orders(s) for This Equipment: If the selected equipment has open work orders, this link 'Open Work Order(s) for this Equipment' will be visible. Click the link to view the open work orders.
i. Equipment Operational: Select 'Yes' if the equipment is operational or 'No' if the equipment is not operational.
j. Bill To Customer: Select the Bill To Customer.
k. Customer Notes: If the relevant Customer has customer notes, they will be displayed and can be modified by clicking the [Edit] button. TIP: Customer Notes can be added in Admin>Customers. Click here to learn more about Customer Notes.
l. Edit Customer Notes: The Customer notes can be edited directly in this screen by clicking the [Edit] button.
m. PO Number: If applicable, enter the PO number.
n. Branch: The Branch is auto populated based on the equipment's branch assignment.
Enter the information needed for the new work order.
- TIP: The required fields have an * by them and must be filled in to create the work order. The required fields will appear red if not completed.
- TIP: A technician or multiple technicians can be assigned in the work order create process here or assigned later.
- NOTE: The minimums/maximums and rounding rules can be set at the work order level by expanding the Rate Settings section.

If a customer or location is unable to be located in the respective drop downs:
- Select the “Unable to Find? Create” button and the user will be directed to the Create Customer or Create Location” page and a Workflow Information process will begin. Fill out all information & Save on each screen.


- Once here, the user will create the customer or location, depending on which you would like to create. Once a location is made, the user will be directed to the “Create Equipment” page. Once the Equipment is made, the user will be directed back to the “Create Work Order” page to finish creating the work order.

Once all information is entered, select the Save button at the bottom of the work order create screen.