Customers/Locations-QuickBooks Online & QuickBooks Desktop
Overview
This article provides the steps for syncing customers and creating customer locations in HQ for both Quickbooks Online and QuickBooks Desktop. QuickBooks (QB) is the primary source for the following information: customers, parts, parts locations, technician accounts, etc. When you have a new customer, you will need to FIRST create the customer (bill to) in QB. Once you have created the customer into QB, you will then need to sync the Customer to HQ. NOTE: The process is slightly different to add Customers to HQ depending on if you use QuickBooks Online or QuickBooks Desktop.
QuickBooks Online
To run the sync follow these steps:
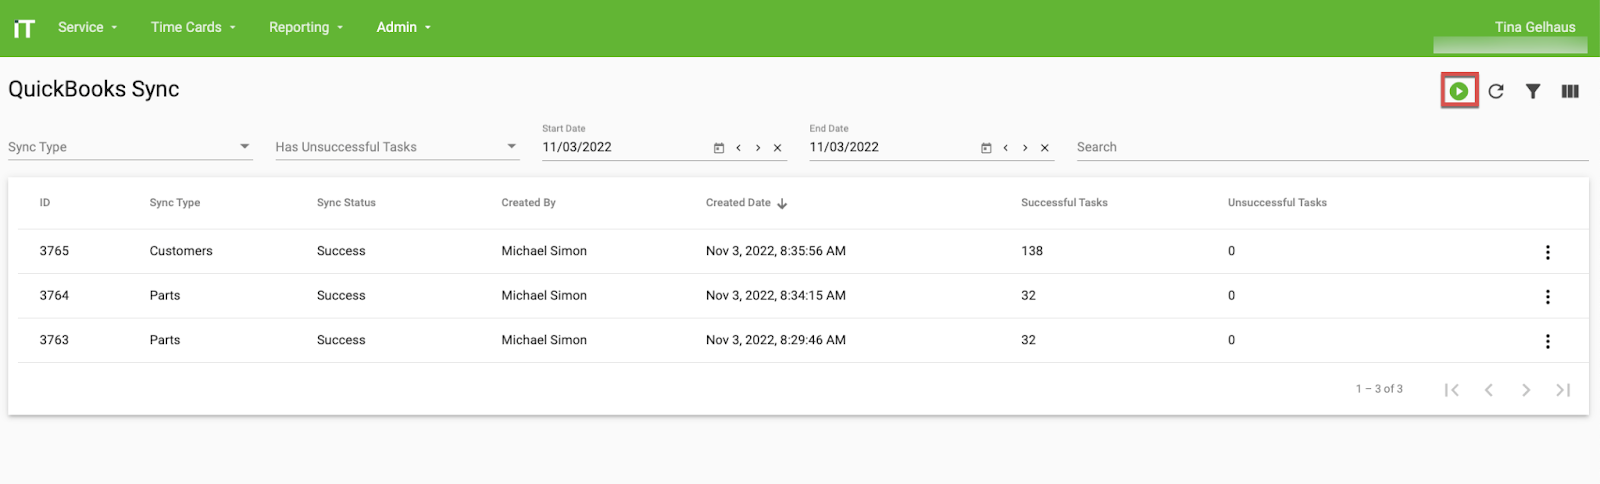
- In HQ, go to Admin/QuickBooks sync.
- At the top, right corner click the [play] button.
- Check the box next to Customers, then click [Run].
- The sync process can take a few minutes, to update the data table click the [refresh] icon. If there are any ‘successful tasks’, continue with Step 5. If none, the sync is completed.
- For any unsuccessful taks, go into the details of the Sync. Click the three vertical dots, then click [Details]
- You will need to find the tasks that were unsuccessful to determine why it couldn’t be uploaded into HQ (i.e. customer name has too many characters). You will need to fix whatever it is in QB, remember QB is always the master.
- Once you have the fixes completed, you can re-run the customer sync process.


Creating Customer Locations (Ship Tos)
For QB Online, once the customer is synced with HQ, you will need to create the location (ship to) in HQ in Admin/Locations. NOTE: The location code is the customer number that was created in HQ.
- To create a Location for your customer in HQ, navigate HQ>Admin>Locations and select the + icon in the top right of the screen.

- Next, enter the required information: Default Bill To Customer, Location Name, Location No & Address and select Save at the bottom of the screen.

When adding the required Location No:
- If only one location exists for the customer, use the respective Customer Reference Number in HQ and add a -1 on the end in the Location No. field. TIP: The Customer Reference Number will display within the Bill To field once selected. For example, customer 614 Excavating with Customer No: 152358 has one location, in the Location No field 152358-1 is entered.

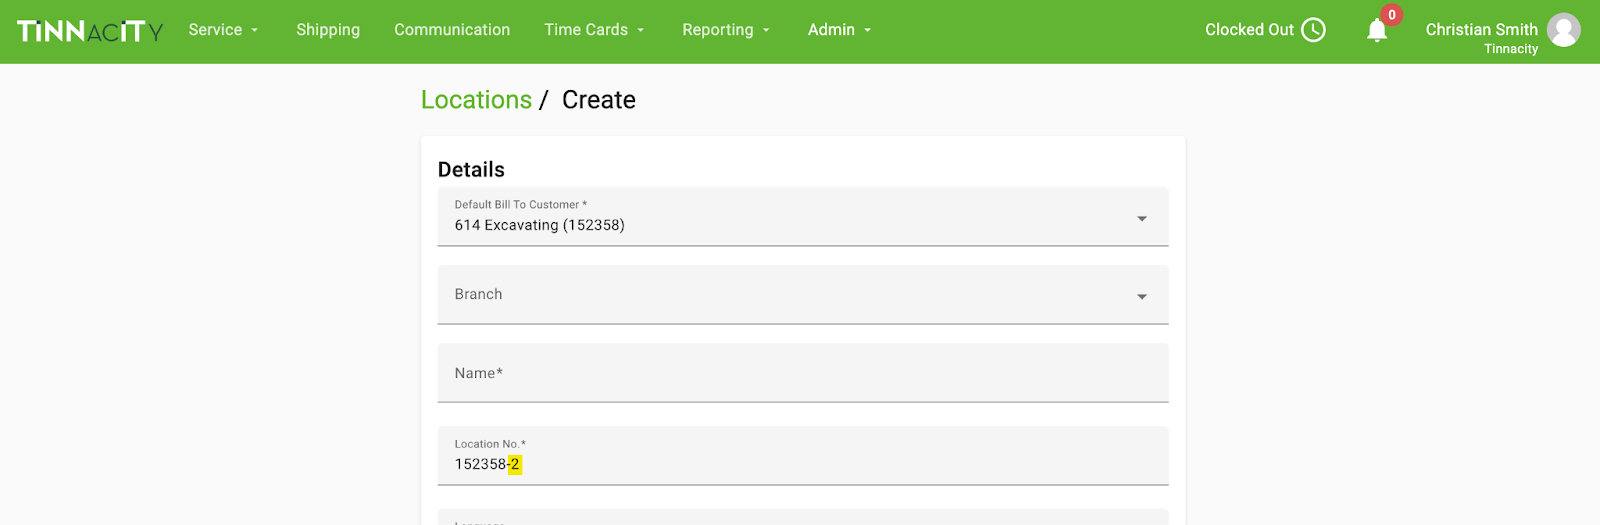
- If multiple locations exist for the same customer: create each one separately. Use the same Bill To, Name the location appropriately, sequence each one with -1, -2, -3 etc (depending on how many locations) in the Location No field and add the address information and select Save at the bottom of the screen. For example, 614 Excavating has 2 locations, the first one is created and saved, then create the second location and add a -2 after the Customer Reference No in the Location No. field.
QuickBooks Desktop
For QuickBooks Desktop, the QuickBooks Next Gen Agent should be installed on anyone’s computer that is involved in invoicing, creating new customer accounts in QuickBooks and/or those who create Parts in QuickBooks. To run the sync follow the below steps:
- On your computer desktop, locate and run the Tinnacity Agent.

Creating Customer Locations
For both QB Online and QB Desktop, once the customer is synced with HQ, you will need to create the location (ship to) in HQ in Admin/Locations. NOTE: The location code is the customer number that was created in HQ.
- To create a Location for your customer in HQ, navigate HQ>Admin>Locations and select the + icon in the top right of the screen.
- Next, enter the required information: Default Bill To Customer, Location Name, Location No & Address and select Save at the bottom of the screen.
When adding the required Location No:
- If only one location exists for the customer, use the respective Customer Reference Number in HQ and add a -1 on the end in the Location No. field. TIP: The Customer Reference Number will display within the Bill To field once selected. For example, customer 614 Excavating with Customer No: 152358 has one location, in the Location No field 152358-1 is entered.
- If multiple locations exist for the same customer: create each one separately. Use the same Bill To, Name the location appropriately, sequence each one with -1, -2, -3 etc (depending on how many locations) in the Location No field and add the address information and select Save at the bottom of the screen. For example, 614 Excavating has 2 locations, the first one is created and saved, then create the second location and add a -2 after the Customer Reference No in the Location No. field.