Shipping Dock
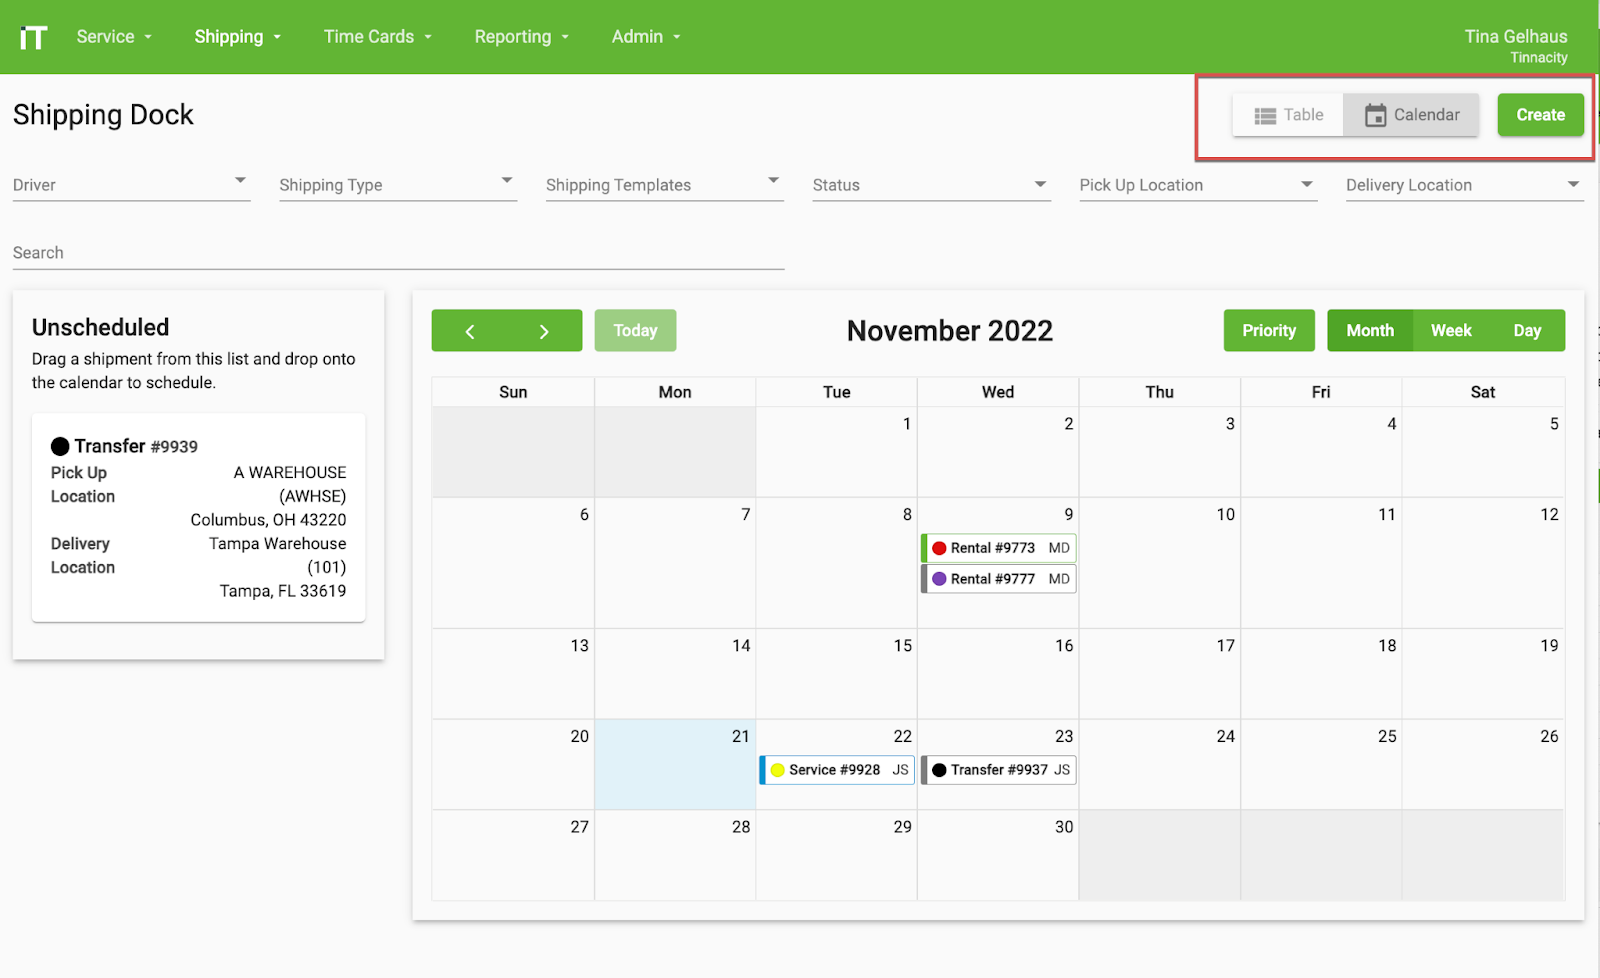
In HQ>Shipping, the Shipping Dock will display where an HQ user can create, manage & schedule shipments for their drivers. By default the Calendar view is on display.
Views
At the top, right corner you can switch between a Table view or the Calendar view, as well as creating a new shipping ticket. The colored circles are a visual color indicator of what type of Shipment it is. TIP: These colors are defined when creating the Shipping Template in HQ>Admin>Shipping Templates.
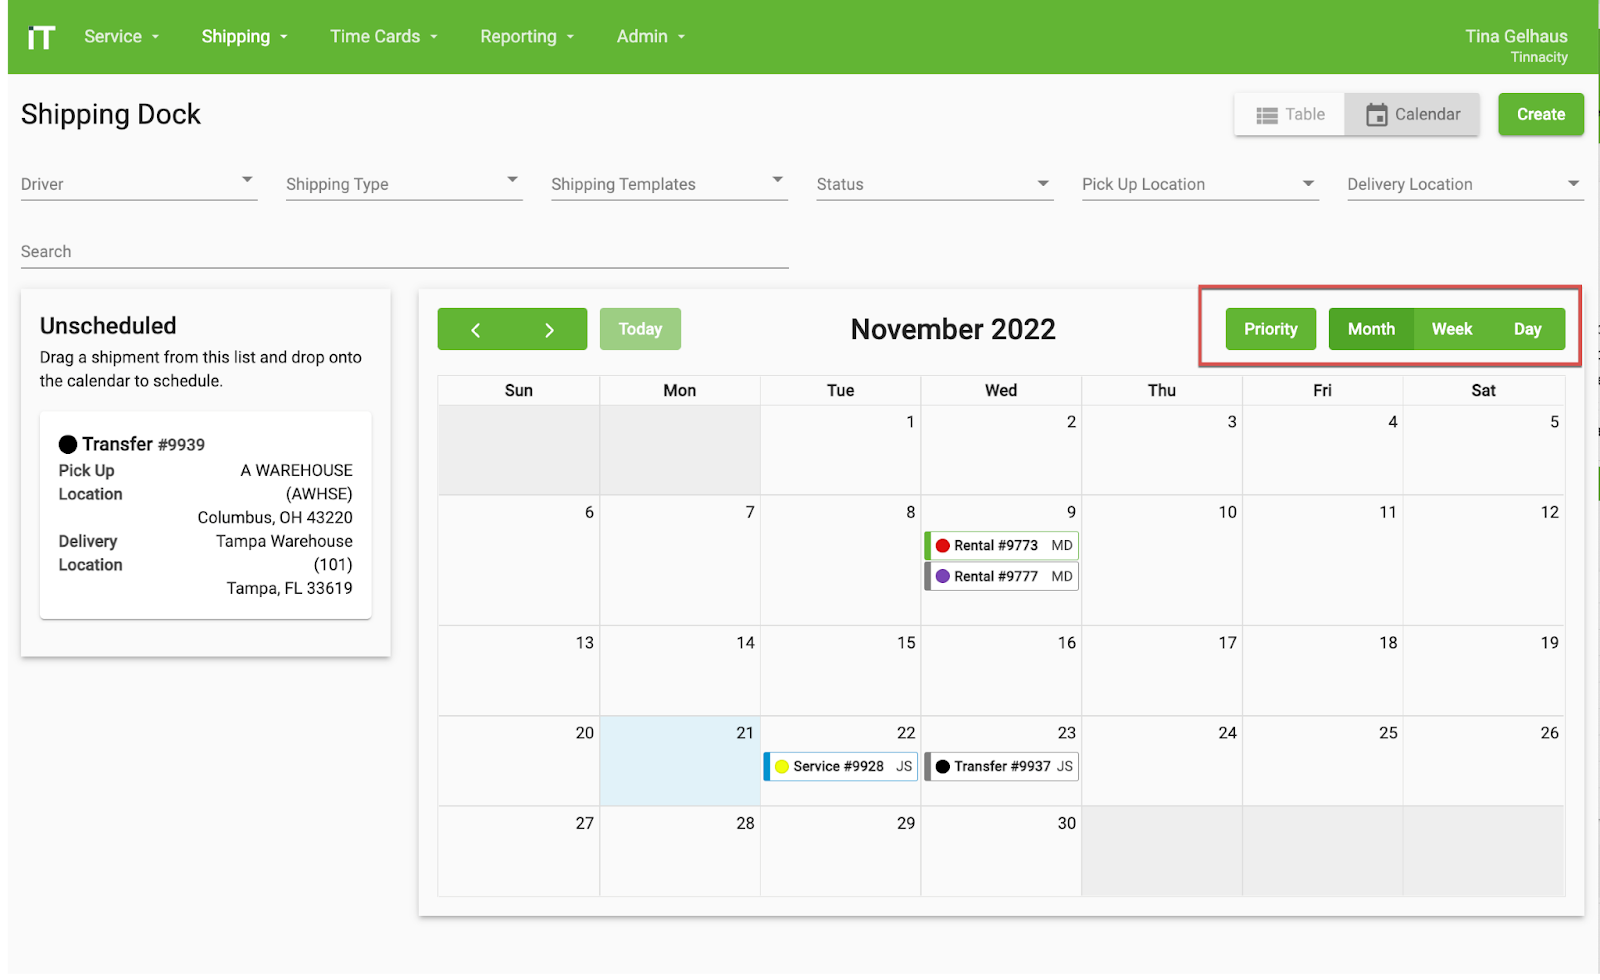
While in the Calendar view, you can view by priority, month, week, or day.
While in Table view, you can manage which columns appear in the table and re-order the columns by using the ‘Manage Columns’ icon or you can export to a .csv format by using the download to .csv icon.

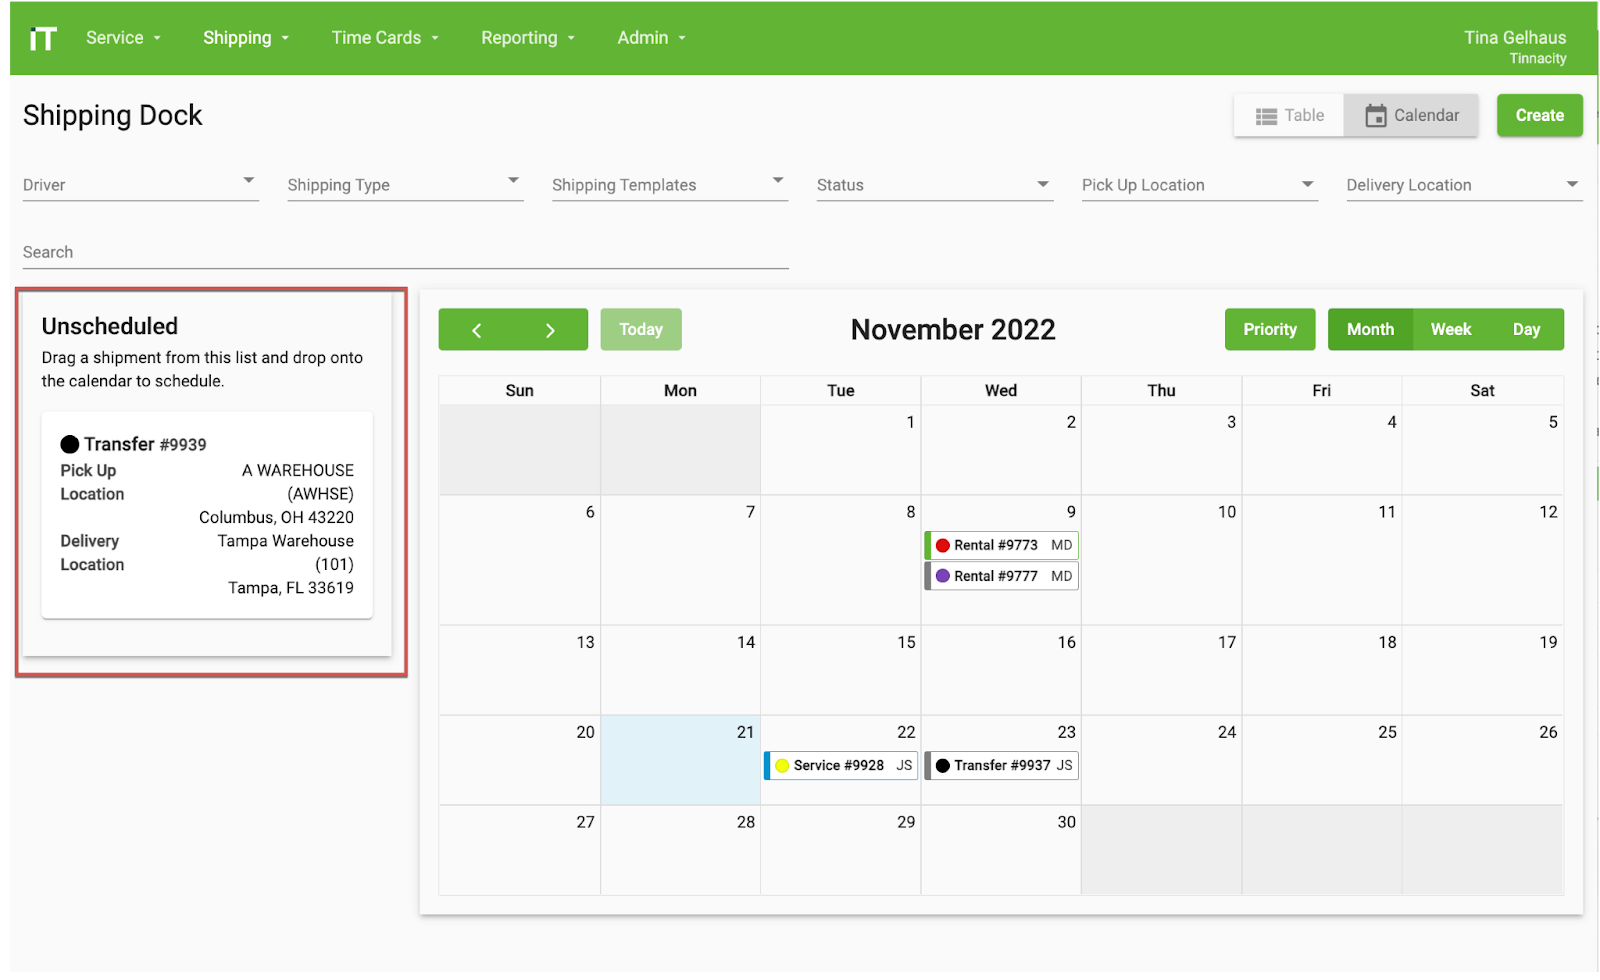
Unscheduled
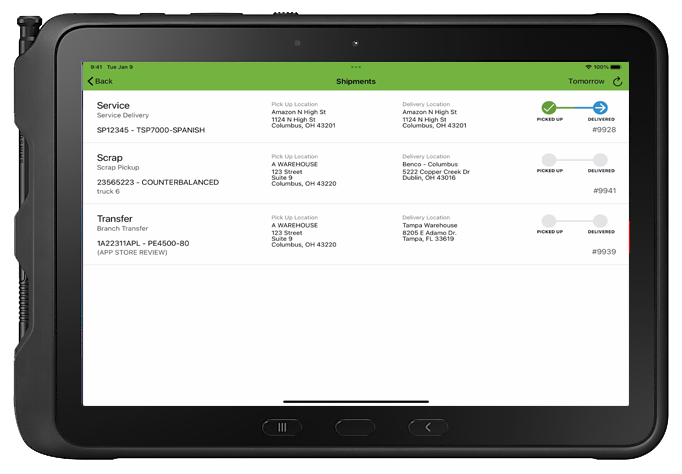
The Unscheduled section will list all shipping tickets that do not have a scheduled date assigned. You can click and drag the ticket to the respective date to schedule it. NOTE: A Driver must be assigned before it will be dispatched. Shipping tickets scheduled for today’s date and/or tomorrow’s date are the only tickets that will be dispatched.
Priority
To set your driver’s schedule, you can set a priority for your shipping tickets. Setting a priority is done by clicking the [Priority] button and selecting the respective Driver’s name. This will then display the shipping tickets for the selected Date/Driver.
Set the priority number (lower numbers are shown first (on top) of the Driver’s list in the Ship app). TIP: It is recommended to leave 5-10 numbers between each priority just in case you get a bigger priority throughout the day.

From the Calendar, clicking the Shipping Ticket card displays the ticket details. TIP: Click the three vertical dots at the top, right corner to download the Pick-Up and/or Delivery PDF or to mark it as collected.
