Codes-HQ (Web)
The Codes page is used to create and configure which codes are available for the technicians and dispatchers to use when working on work orders. Codes can be used for a variety of reasons and can only be created within HQ. They can be specific error/diagnostic codes or simply an additional tool to help describe a Cause or a Correction. A user can distinguish between a Cause: what they found as to be the cause or the reason of service being needed or Correction: the action or the service performed when creating the code within HQ. A user can also tailor Cause/Correction codes by work order type. If configured, at least 1 Cause and/or Correction code would be required on a specific work order type. To manage this: HQ>ADMIN>Work Order Types NOTE: The code used will not display on the Customer Completed Work Order PDF nor will it integrate with your business system.
To access Codes:
- Within the Admin drop down menu select [Codes]:

- From here you can create, edit or delete Codes. To create press the [+] button on the upper right. To edit or delete a Code, press the 3 dots next to the corresponding Code and select the action you wish to take:

- To create a Code, after selecting the [+] button on the upper right, first select your type of code: Cause or Correction, then enter the Code and Description. You may also enter a Group, though it is not a required field, in this example Yale is entered. Once all fields are complete, click [Save]. NOTE: The Type, Code & Description fields are required.

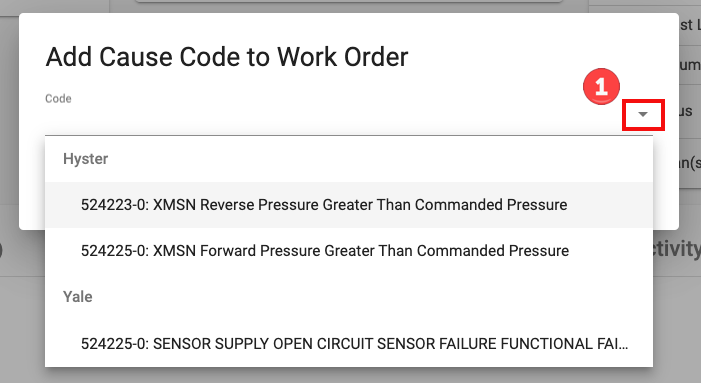
- Once a code is created, it can be added to a work order within HQ and/or the Service app. Click here for more info on how techs can add codes in the Service app. NOTE: remember Codes can only be created within HQ and not within the Service app . To add a code to a work order within HQ: click on the work order you wish to add the code to. At the bottom of the work order details screen you will see a section labeled Codes, select [Codes] and from here click [Add]. You will then be given 2 options: Cause or Correction. Select which you want to add and a drop down menu of all available options for either cause or correction will display. Once you select the code you'd like, click [Save].


- Once complete, the Code will display within the details screen

- To require a Cause/Correction code on a specific work order type:
- HQ>ADMIN>Work Order Types: select the work order type you want to configure and click Edit
- Scroll down to Cause/Correction and toggle on/off
