Checklists Overview
Click the appropriate link to directly access the relevant topic within this article.
What is the purpose for checklists?
How do I create a checklist name?
How do I create custom checklist option answers?
How do I manually add a group of questions?
How do I import groups and questions?
How do I assign a checklist to an equipment model?
How do I mass assign a checklist to multiple models?
How do I assign a checklist based on the model's "Model Type"?
How to export an existing checklist?
How does a technician use the checklist in the Service app?
How can I create custom checklist answer options?
Purpose
An inspection checklist serves as a comprehensive tool designed to ensure that all essential steps, tasks, and criteria are systematically examined and verified during an inspection process. It helps to maintain consistency, accuracy, and thoroughness, ensuring that no critical details are overlooked or missed.
When creating a checklist, you must first create the checklist's name. After that, you have two options to add questions: you can either manually add groups of questions or use the import feature. The import feature requires a specially formatted .csv file that contains the group name and the questions within that group.
Checklist Name
To create a checklist name, follow the steps below:
-
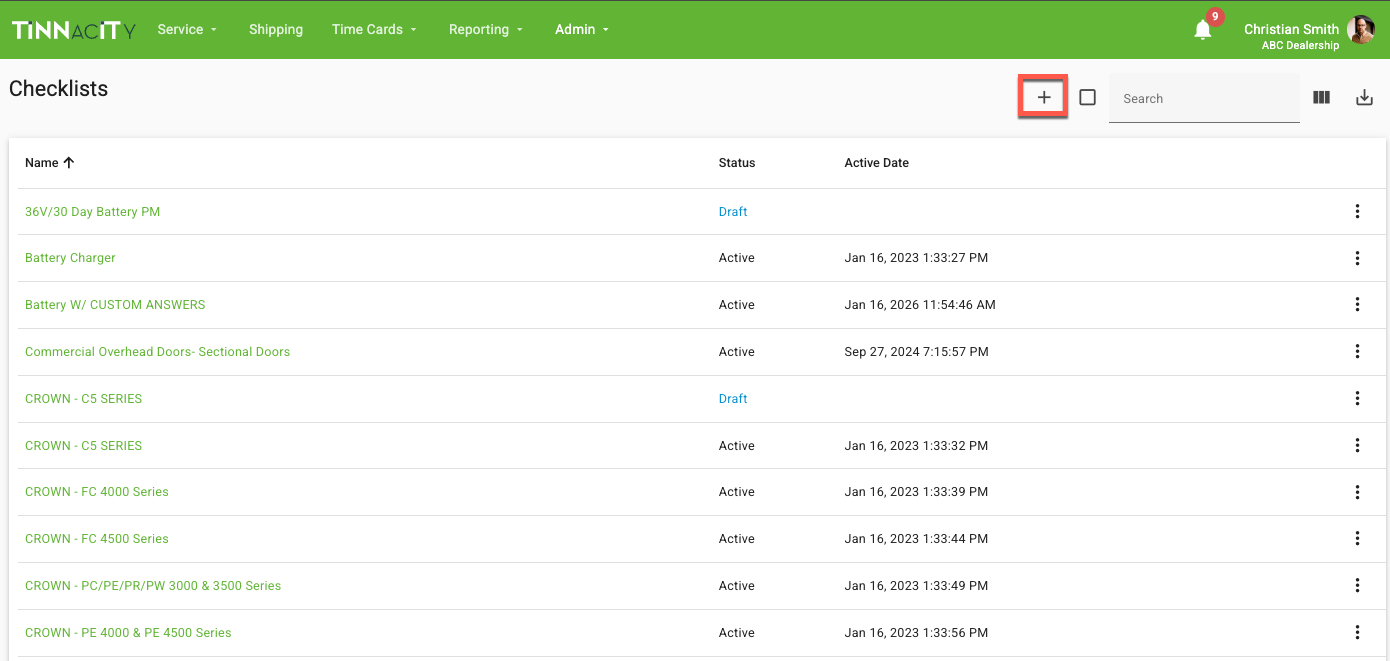
In HQ, go to Admin/Checklists, create [+] sign.
-
Enter a Name (required) and Company Reference (optional). Click [Save]. Upon Save, additional options are available. In the Checklist list, locate the respective checklist. Click the three vertical dots, then select Details. Upon creation, the checklist is in 'Draft' mode and will not be used until it is activated.


Custom Checklist Answer Options
Instead of using Tinnacity's default canned responses (Okay, Urgent, Repair/Replace, Adjustments Needed), you can create custom answer options in Admin>Checklist Answer Options to use within the checklists. Click here to learn more about Custom Checklist Answer Options.
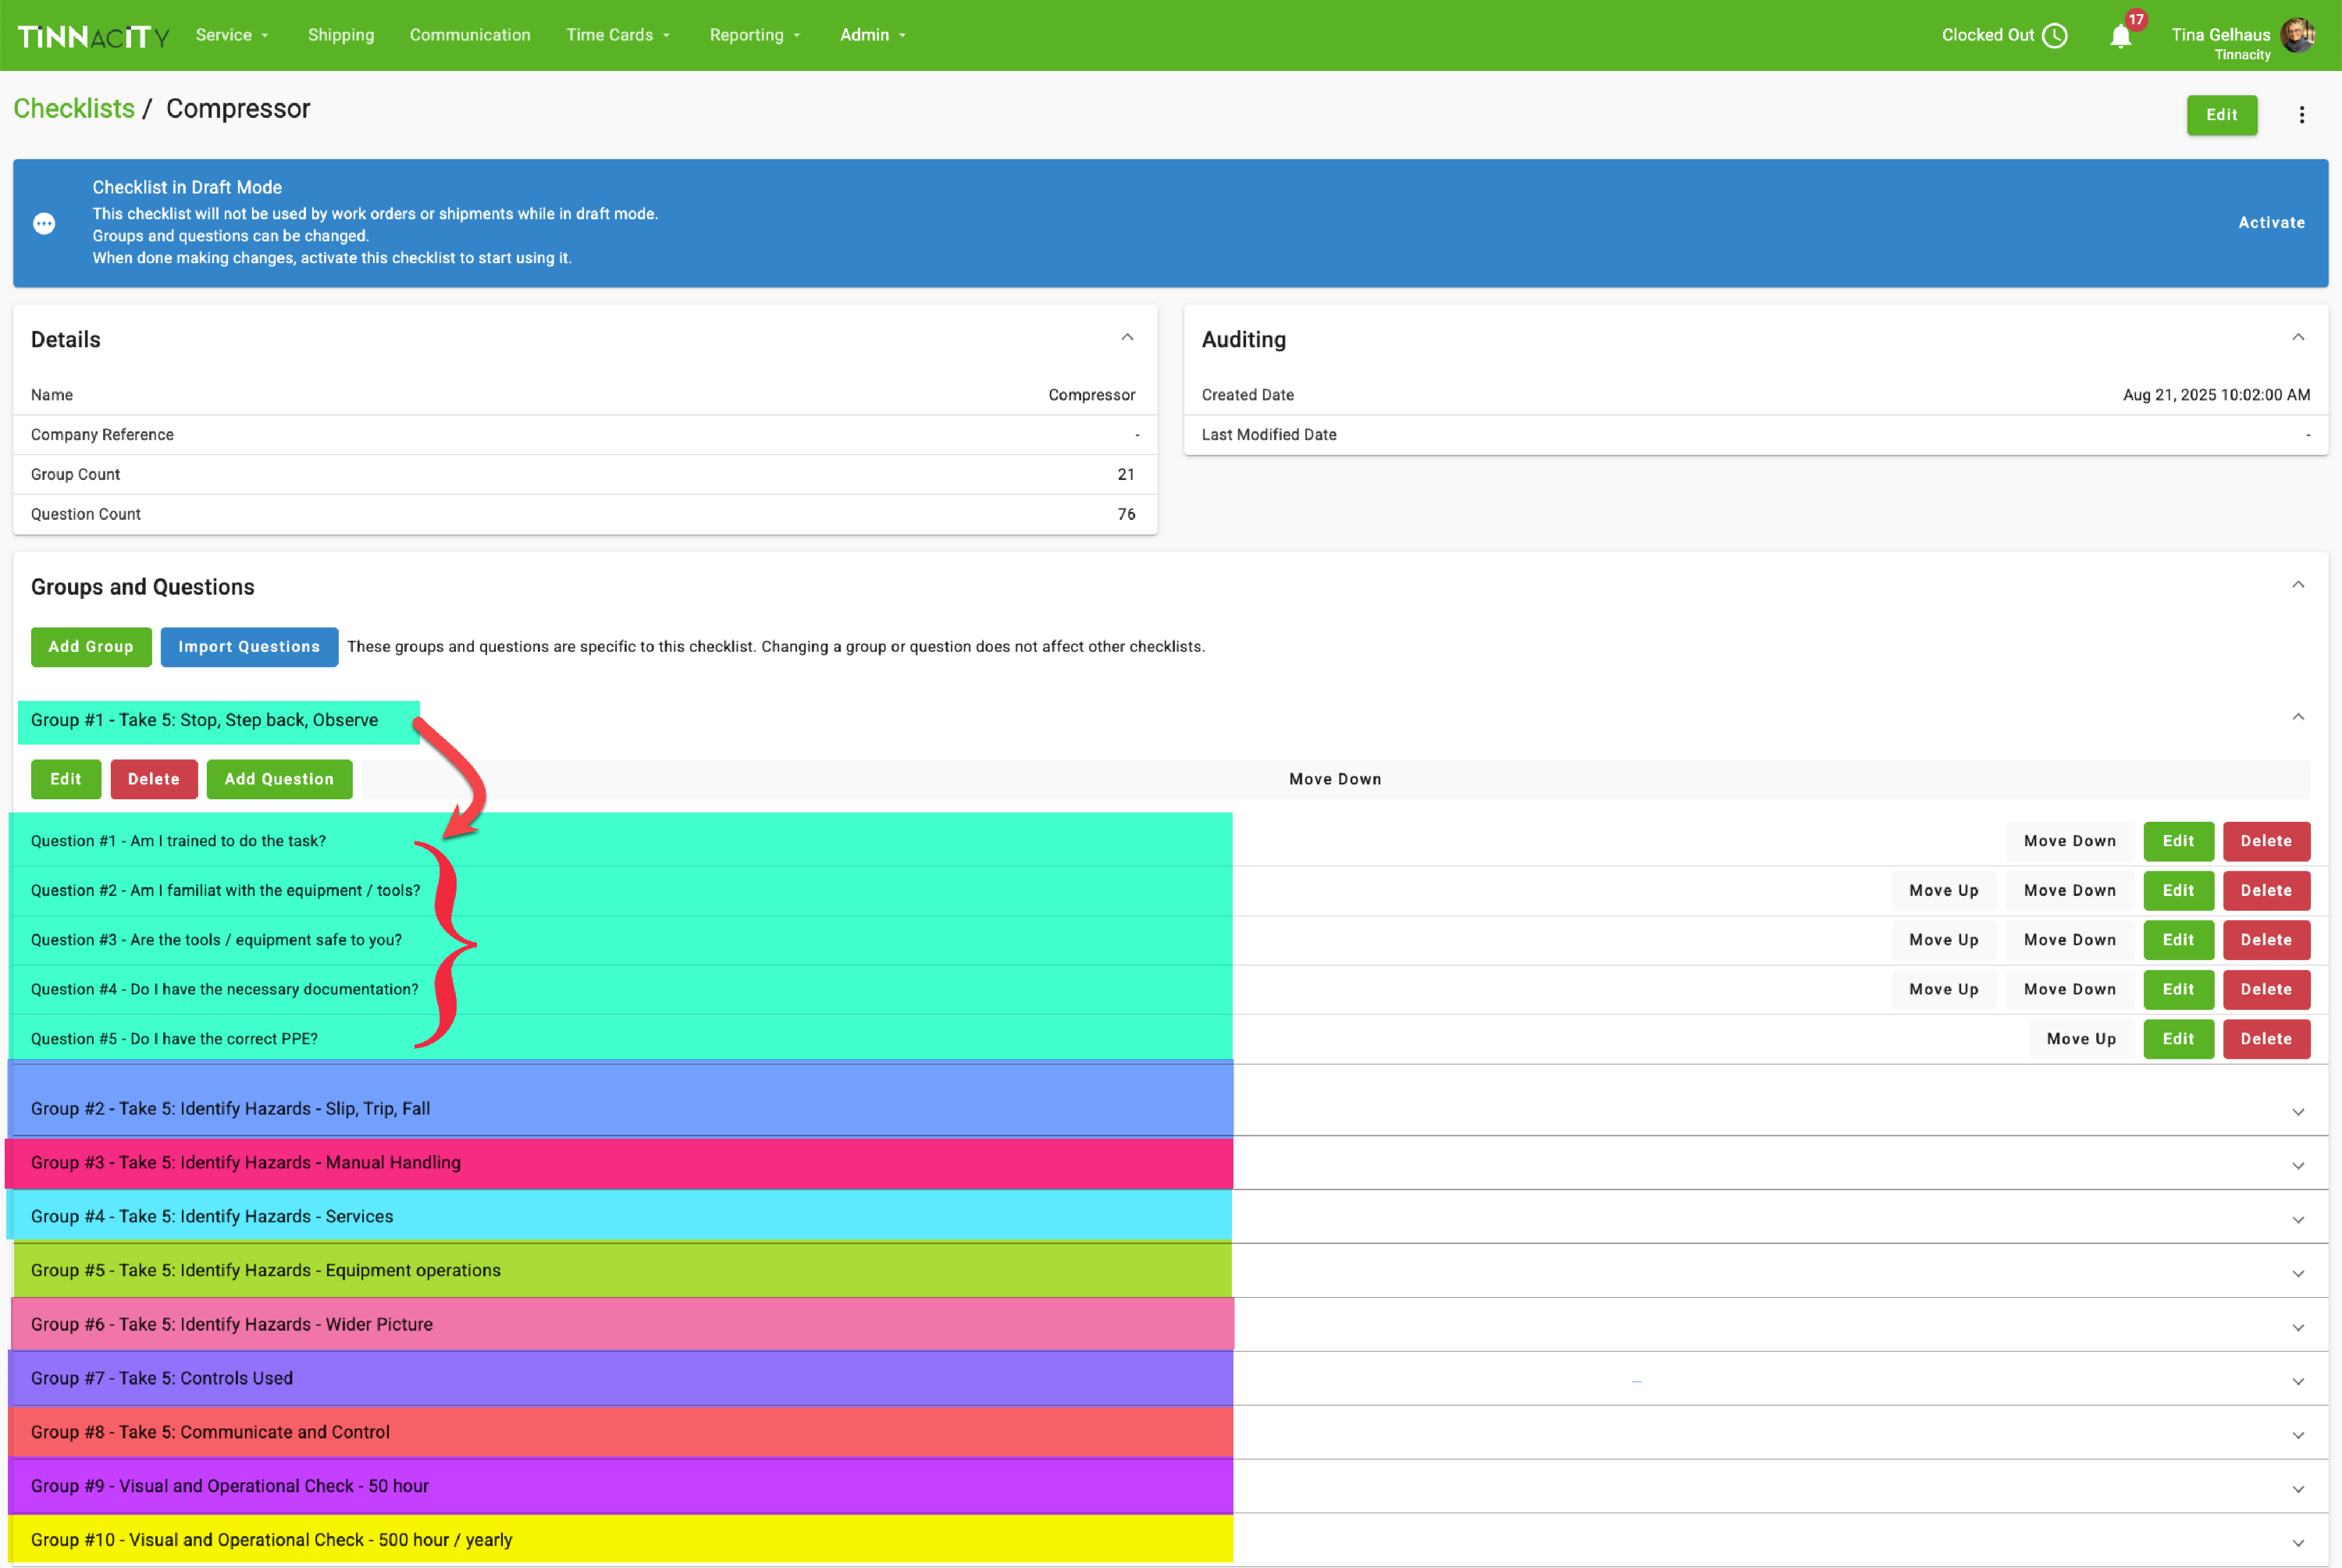
Manually Add Group Name(s) and Question(s)
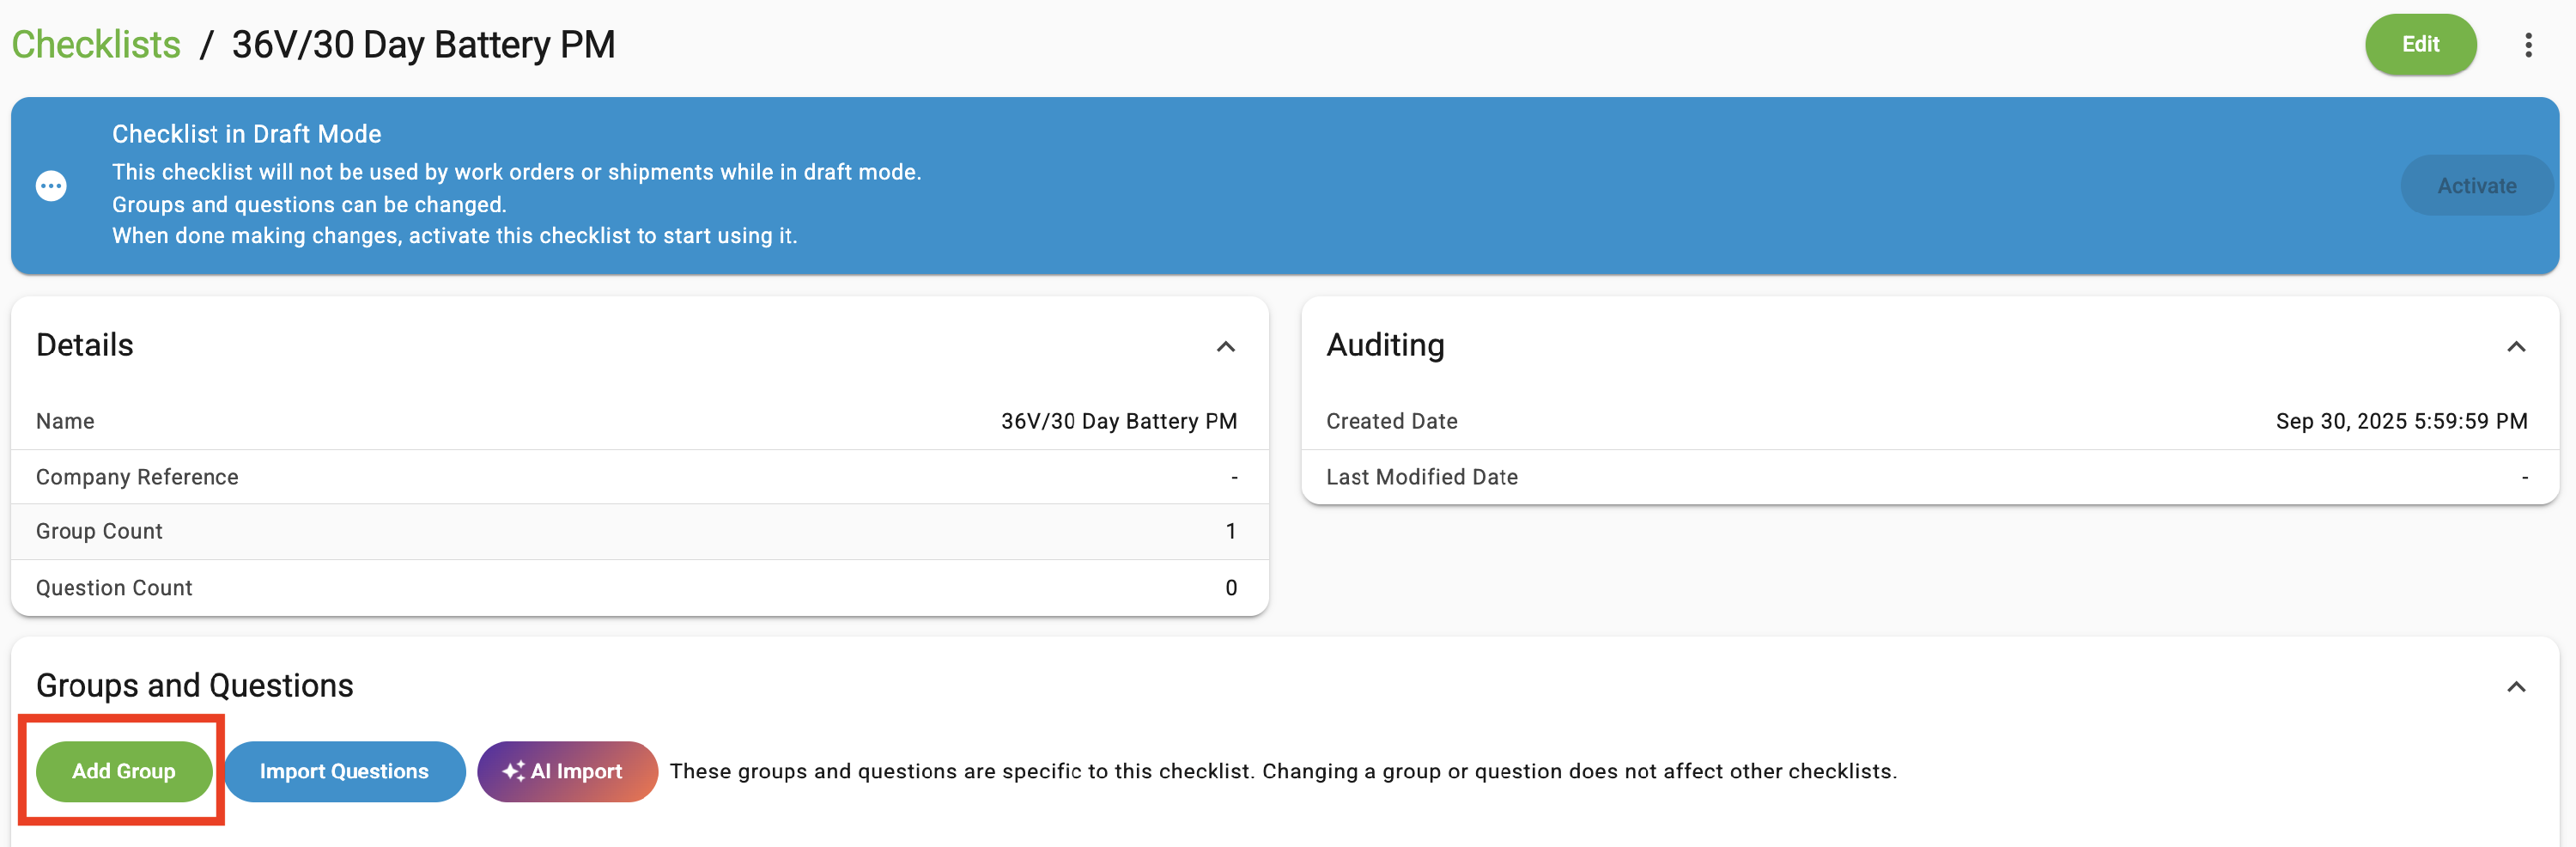
A Group must be added first, then questions within that group can be added. Upon creating the checklist's name, click the checklist's name or click the three vertical dots, then select Details.
NOTE: To update an existing checklist, you must first create a Draft.
-
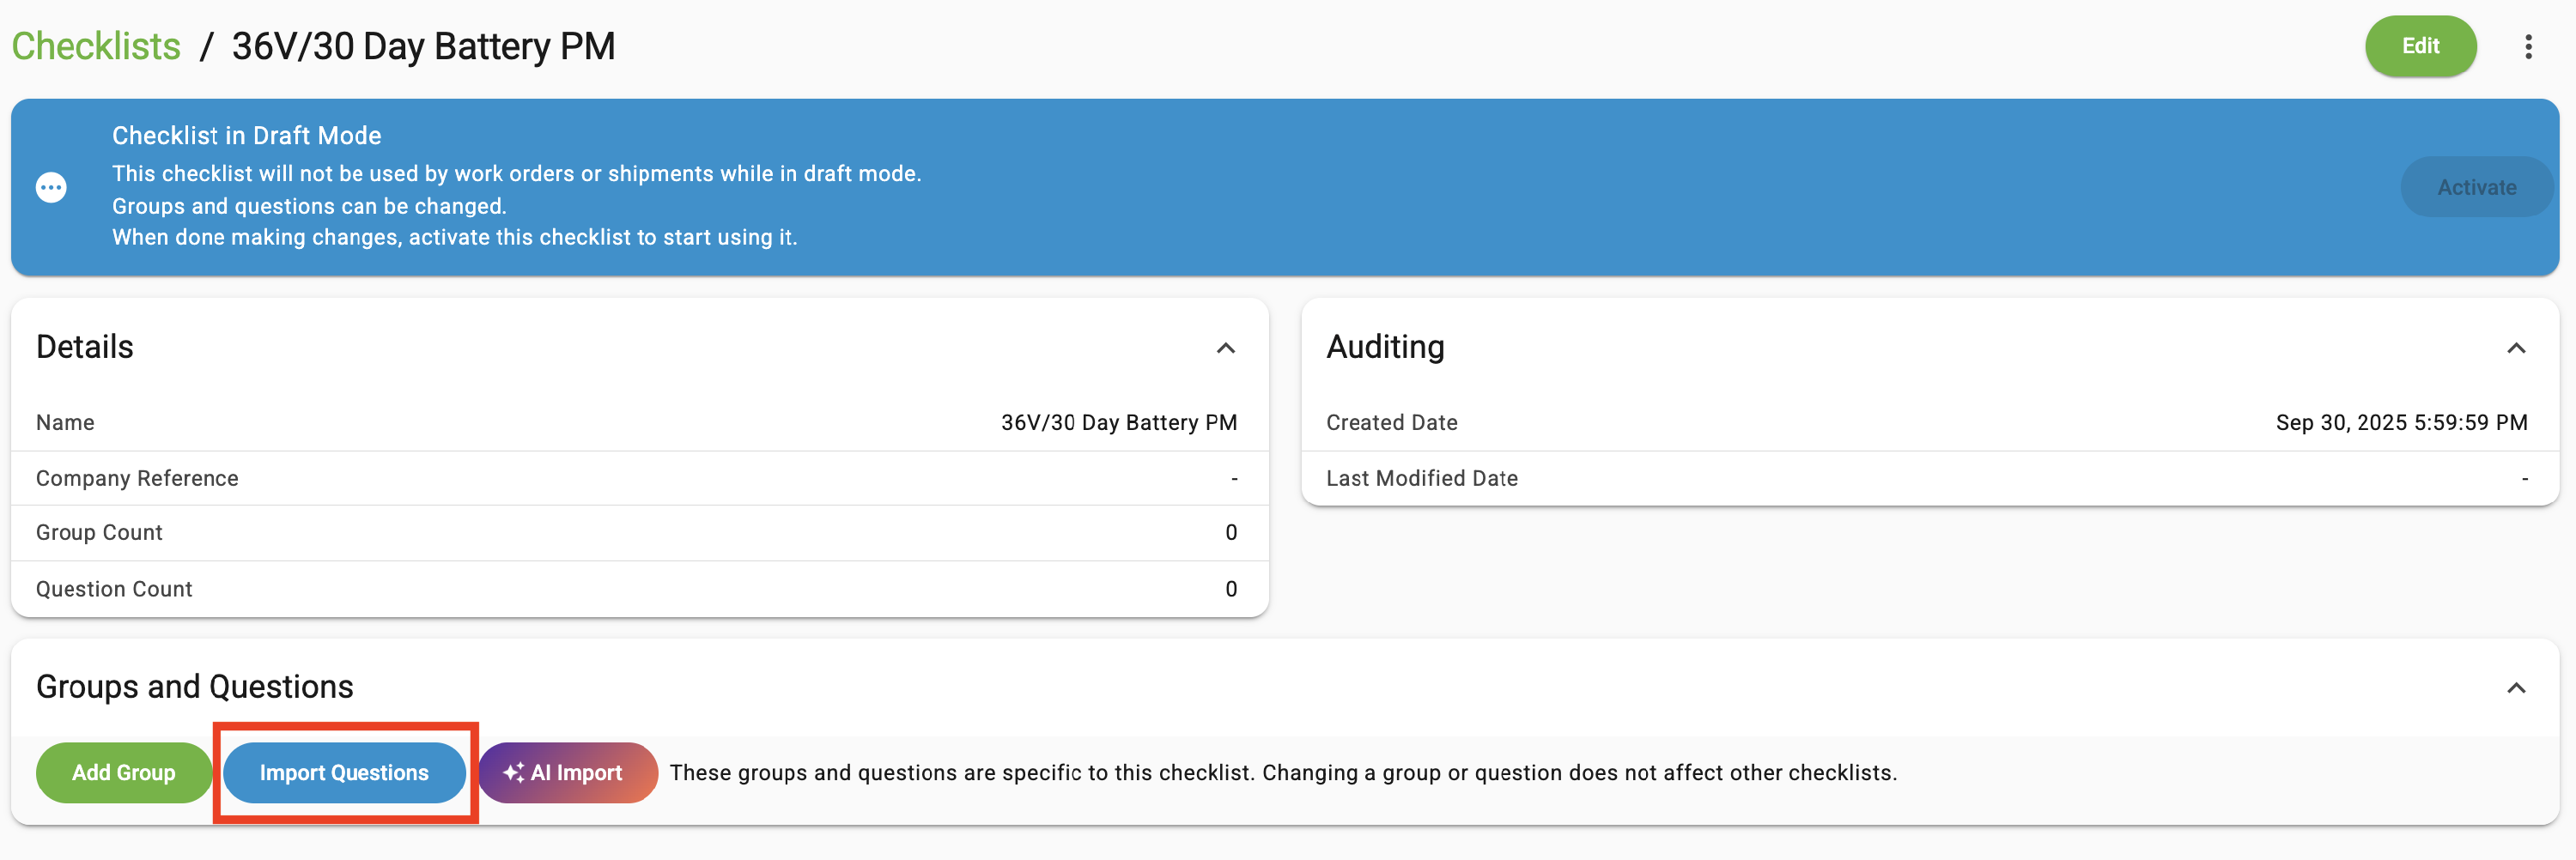
While in the checklist details, click [Add Group]. NOTE: See section Import Questions to learn how to import groups and questions.
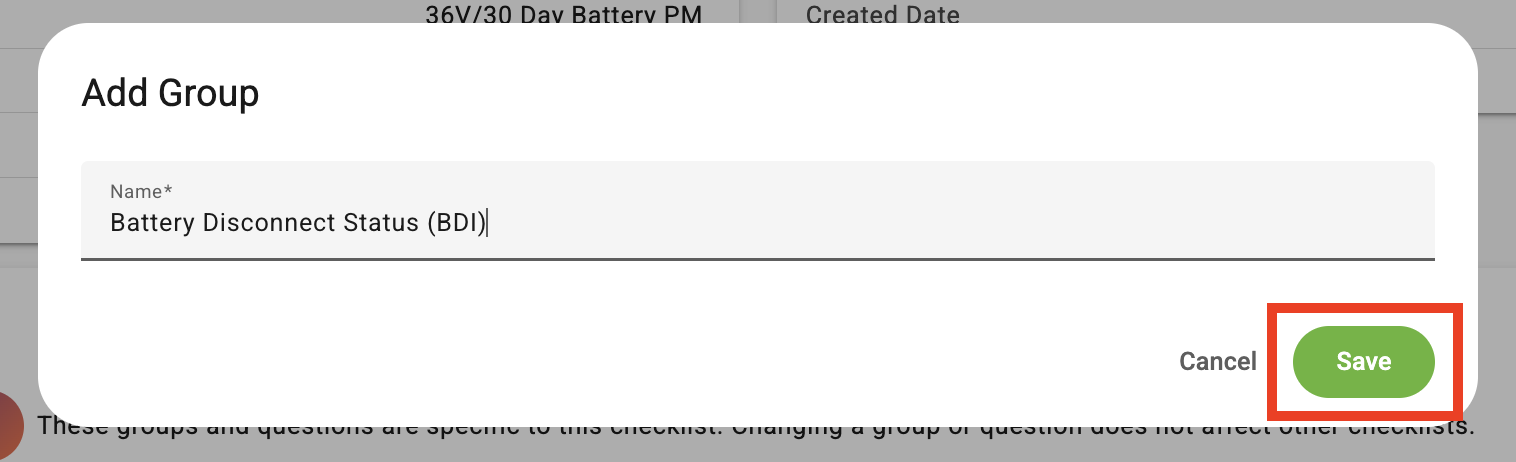
Enter the Group name, then click [Save].


- Click [Add Question]. TIP: If the Add Question is not visible, click the arrow located on the right side of 'Groups'.

- Enter the Question, then select the Answer Type. Click [Save].

- Canned (OK, Repair/Replace, Adjustment needed, Urgent): These are the default used today.
-
Custom: These are the custom answer options discussed in this section - Custom Checklist Answer Options.
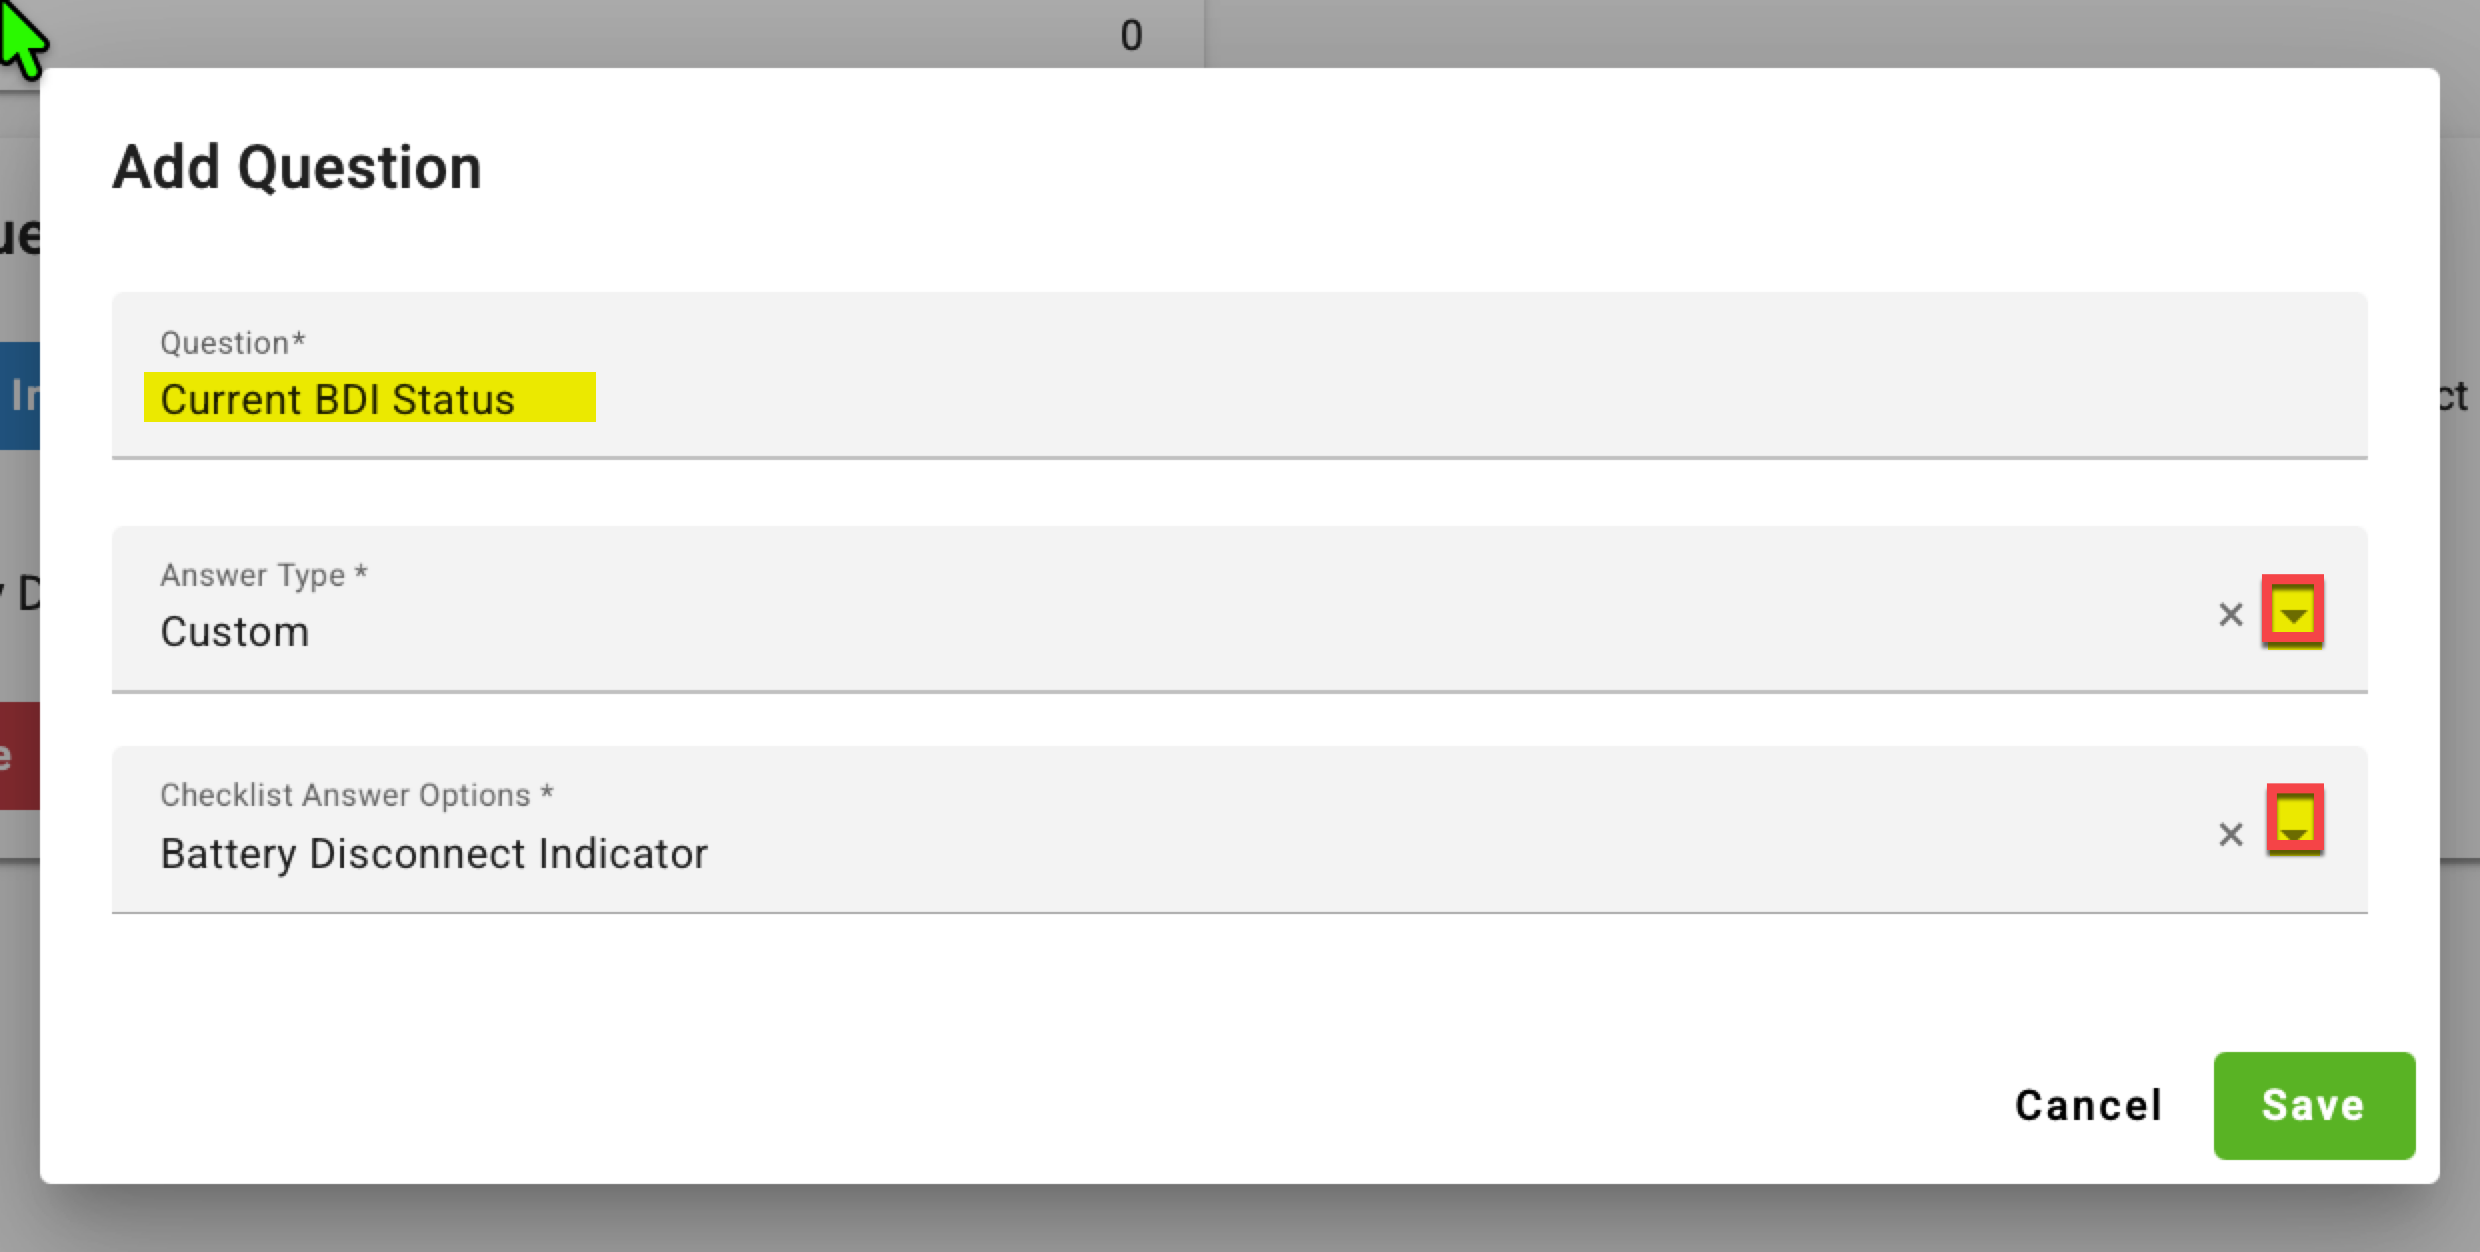
- Integer: A number that is not a fraction; a whole number.
- Decimal: A number relating to or denoting a system of numbers and arithmetic based on the number ten, tenth parts, and powers of ten.

Continue entering all questions for the relevant Group. If a new group of questions is needed, repeat Steps 1-2.
Once the checklist is completed successfully and you are ready to begin using it, click [Activate]. This will activate the checklist.

Import Groups and Questions
Streamline the procedure by organizing your groups and questions in a .csv file, it is required that the .csv file be formatted as outlined below. Before you can use the import feature, you must first create the Checklist Name.
- Using Excel or an applicable software, create the .CSV file in this format.
- Column A = Group Name
- Column B = Question to include in the relevant Group.
- Column C = Answer Type (Canned, Custom, Integer, or Decimal)
- Column D = Custom (Required if Answer Type = Custom)
- Column E = Waring Threshold (Required if Answer Type = Decimal or Integer)
- Column F = Urgent Threshold (Required if Answer Type = Decimal or Integer)
- Column G = Above Threshold (Required if Answer Type = Decimal or Integer), this will reverse the Warning/Urgent Thresholds. Yes = Checked / No = Not Checked
-
-
Save the file as a .csv file format.
-
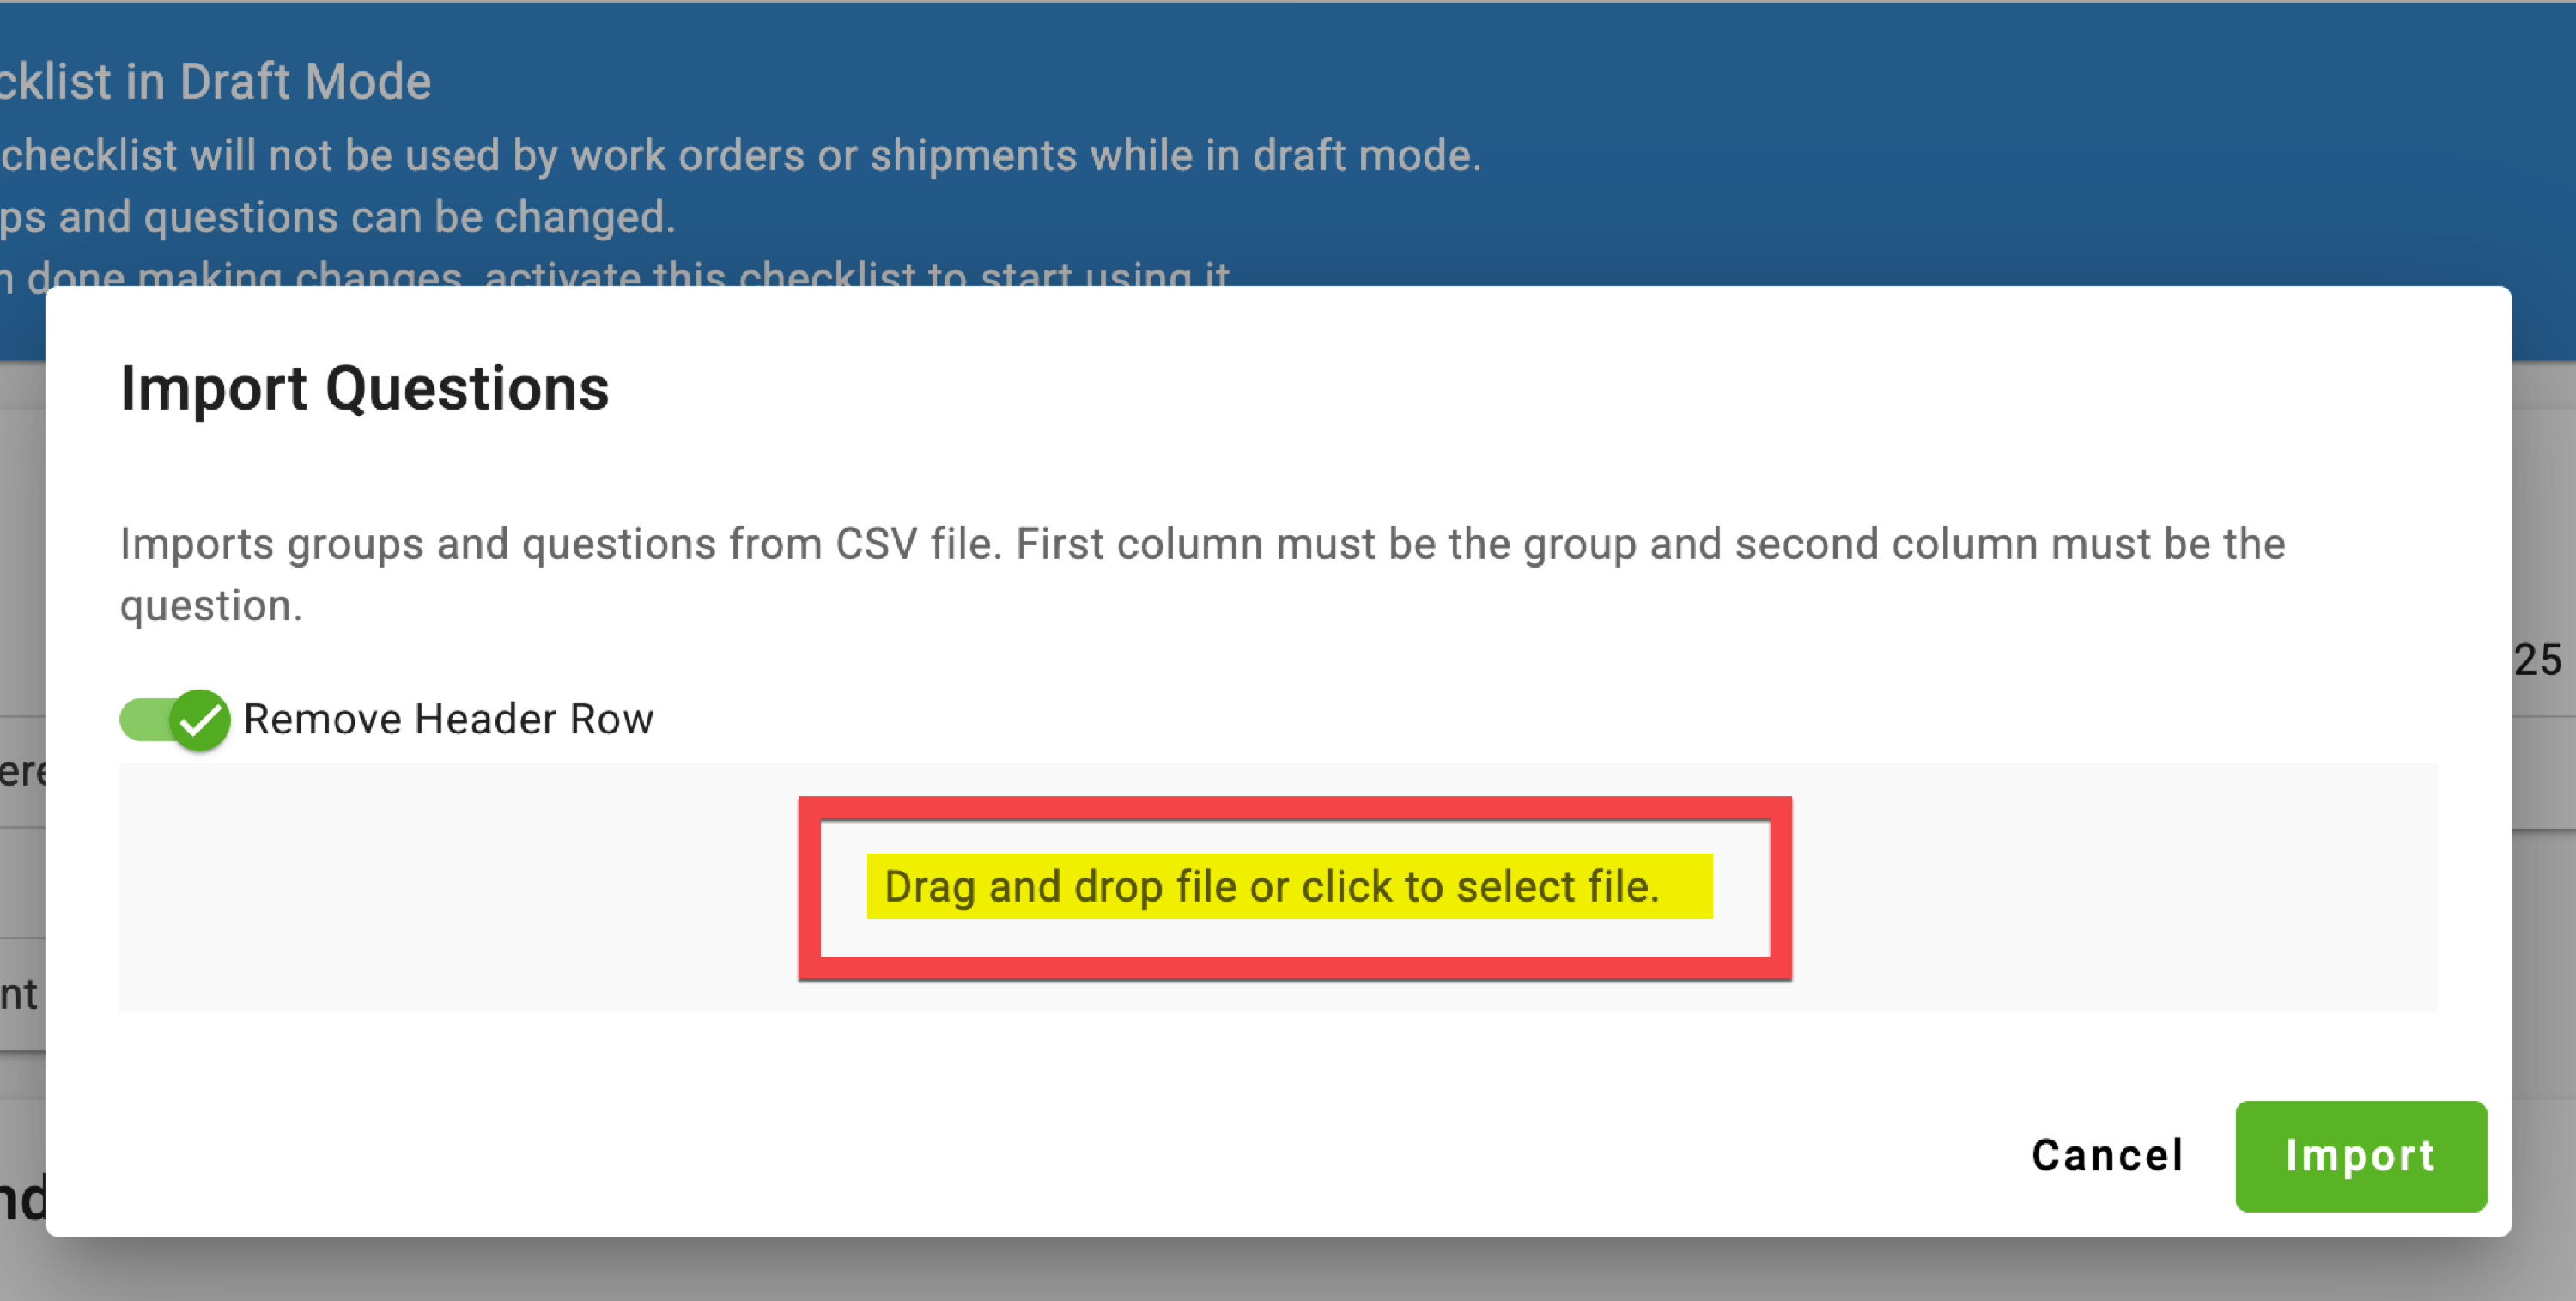
While in the Checklist details, click [Import Questions].
-
Either Drag and Drop the relevant .csv file here or click here to browse for the .csv file. NOTE: Toggle Remove Header Row if your CSV has a header row (i.e, Category, Question, Answer Type, Custom, Warning Threshold, Urgent Threshold, Above Threshold).
- The checklist's categories and the questions within each category are now imported. NOTE: Before the checklist can be used, it must be assigned to a model. Click [Activate].


-
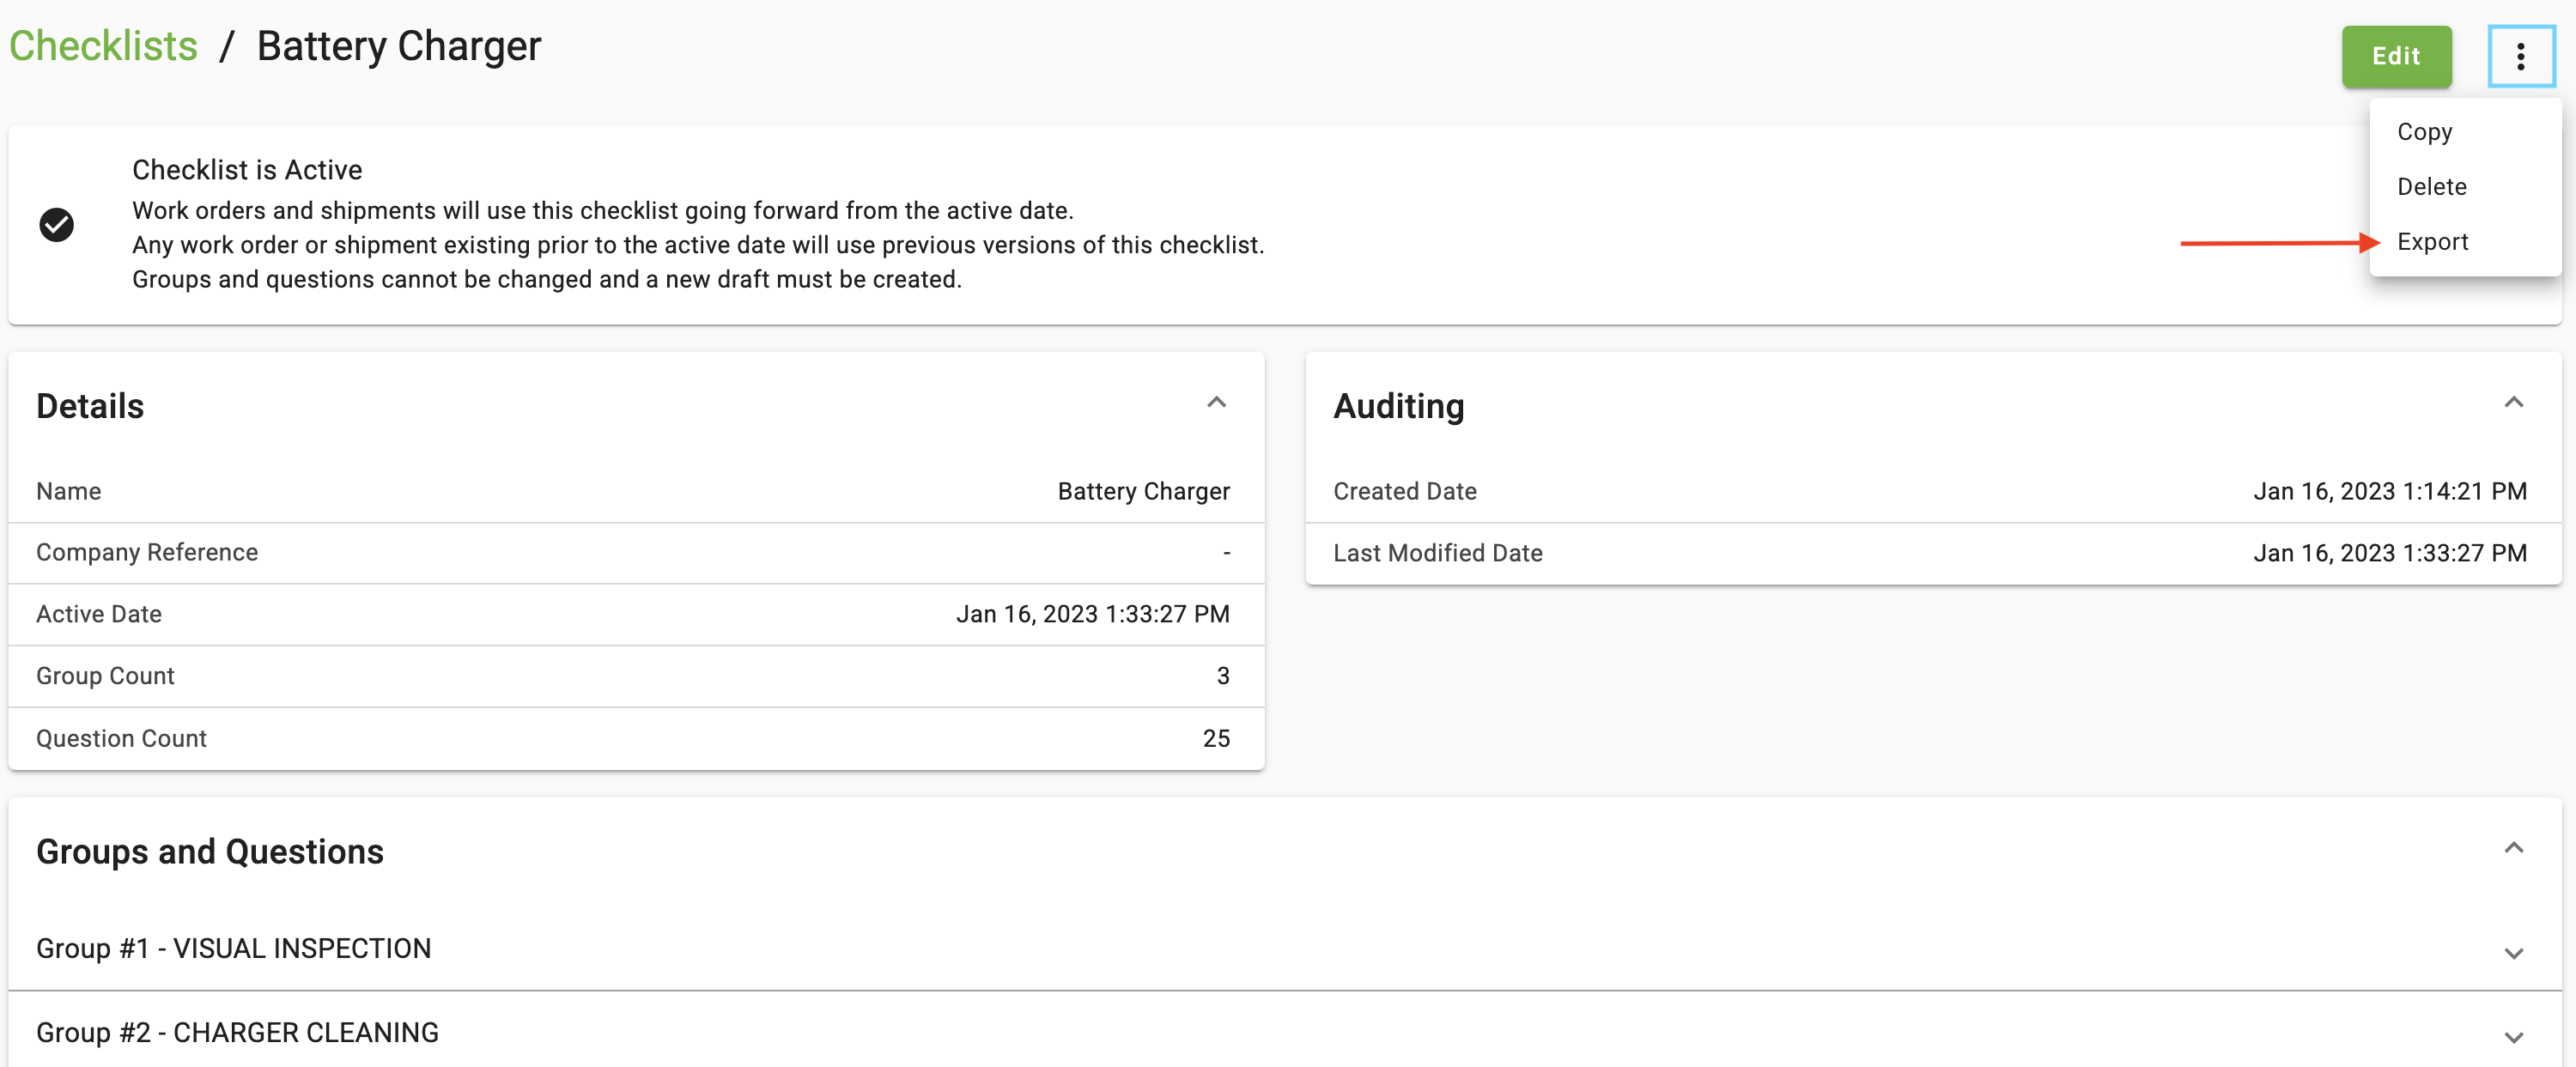
TIP: If you would like to export an existing checklist to a .CSV file, when in the checklist details screen, click the three dots in the top-right portion of the screen and select Export.


Import Entire Checklist Using AI Import
To use the AI Import feature, follow the steps below:
- In the checklist details, click [AI Import].

- Either Drag and Drop the relevant file here or click here to browse for the file. NOTE: This import option will only accept PDF files and image files (.pdf, .jpg/.jpeg, or .png).

- Wait about 30 seconds. The Groups and Questions from your file will populate. Note: If a checklist has an unusual format, this feature may not replicate it perfectly. Always verify that the new Groups and Questions match the original.

Modify a Checklist
To update an existing checklist, follow the below steps:
-
Locate the respective checklist, then click the three vertical dots and select Details.

-
Before you can make changes to the existing checklist, you must create a draft of it. Click [Create Draft].

-
Click [OK] to continue.

- Make the necessary changes, upon completion - click Activate to start using the newly updated checklist. NOTE: Work Orders that were created using the previous checklist will continue to use that version, only newly created Work Orders will use the newly updated checklist.
-


NOTE: Due to checklists being assigned to equipment on PM work orders, you will not be able to edit a dispatched work order. You would have to cancel that work order and create a new one and add that equipment and checklist.
Assign checklist based on Model Type
If your business system is integrated and uses model types, Tinnacity syncs each model type assigned to the equipment. To simplify checklist assignment, if all models with a specific model type (e.g., Internal Combustion) should use the same checklist, assign it under Admin > Model Types. However, if certain units require a different checklist, assign it at the model level under Admin > Models. Click here to learn more about Model Types.
How to Export an existing Checklist
Existing checklist can be exported as a csv. file. Once exported you can then take the csv. file and turn it into a spreadsheet or pdf. Here's how:
- In Admin > Checklist locate the checklist you wish to export & open to the details screen
- In the top right select the 3 dots and then select Export

- Once exported to a csv, should you need to convert the csv to a pdf, depending on if you use Microsoft Excel or Google Sheets, follow the steps below to convert the csv a pdf
- For Microsoft Excel:
- Open the file: Right-click your CSV file and select Open with > Excel.
- Format the data: Adjust column widths so the text isn't cut off. You can double-click the line between column headers to "auto-fit" them.
- Page Layout: Go to the Page Layout tab. I recommend changing the Orientation to Landscape if you have many columns.
- Save as PDF: * Go to File > Save As (or Export).
- Choose PDF from the file format dropdown menu.
- Click Save.
- For Google Sheets:
- Upload: Go to Google Sheets and click the File Picker (folder icon) > Upload to bring in your CSV.
- Adjust: Make sure the columns look the way you want them to appear on paper.
- Download as PDF:
- Go to File > Download > PDF document (.pdf).
- Print Settings: A settings screen will appear. Ensure "Fit to Width" is selected so your data doesn't spill off the side of the page.
- Export: Click the blue Export button at the top right.
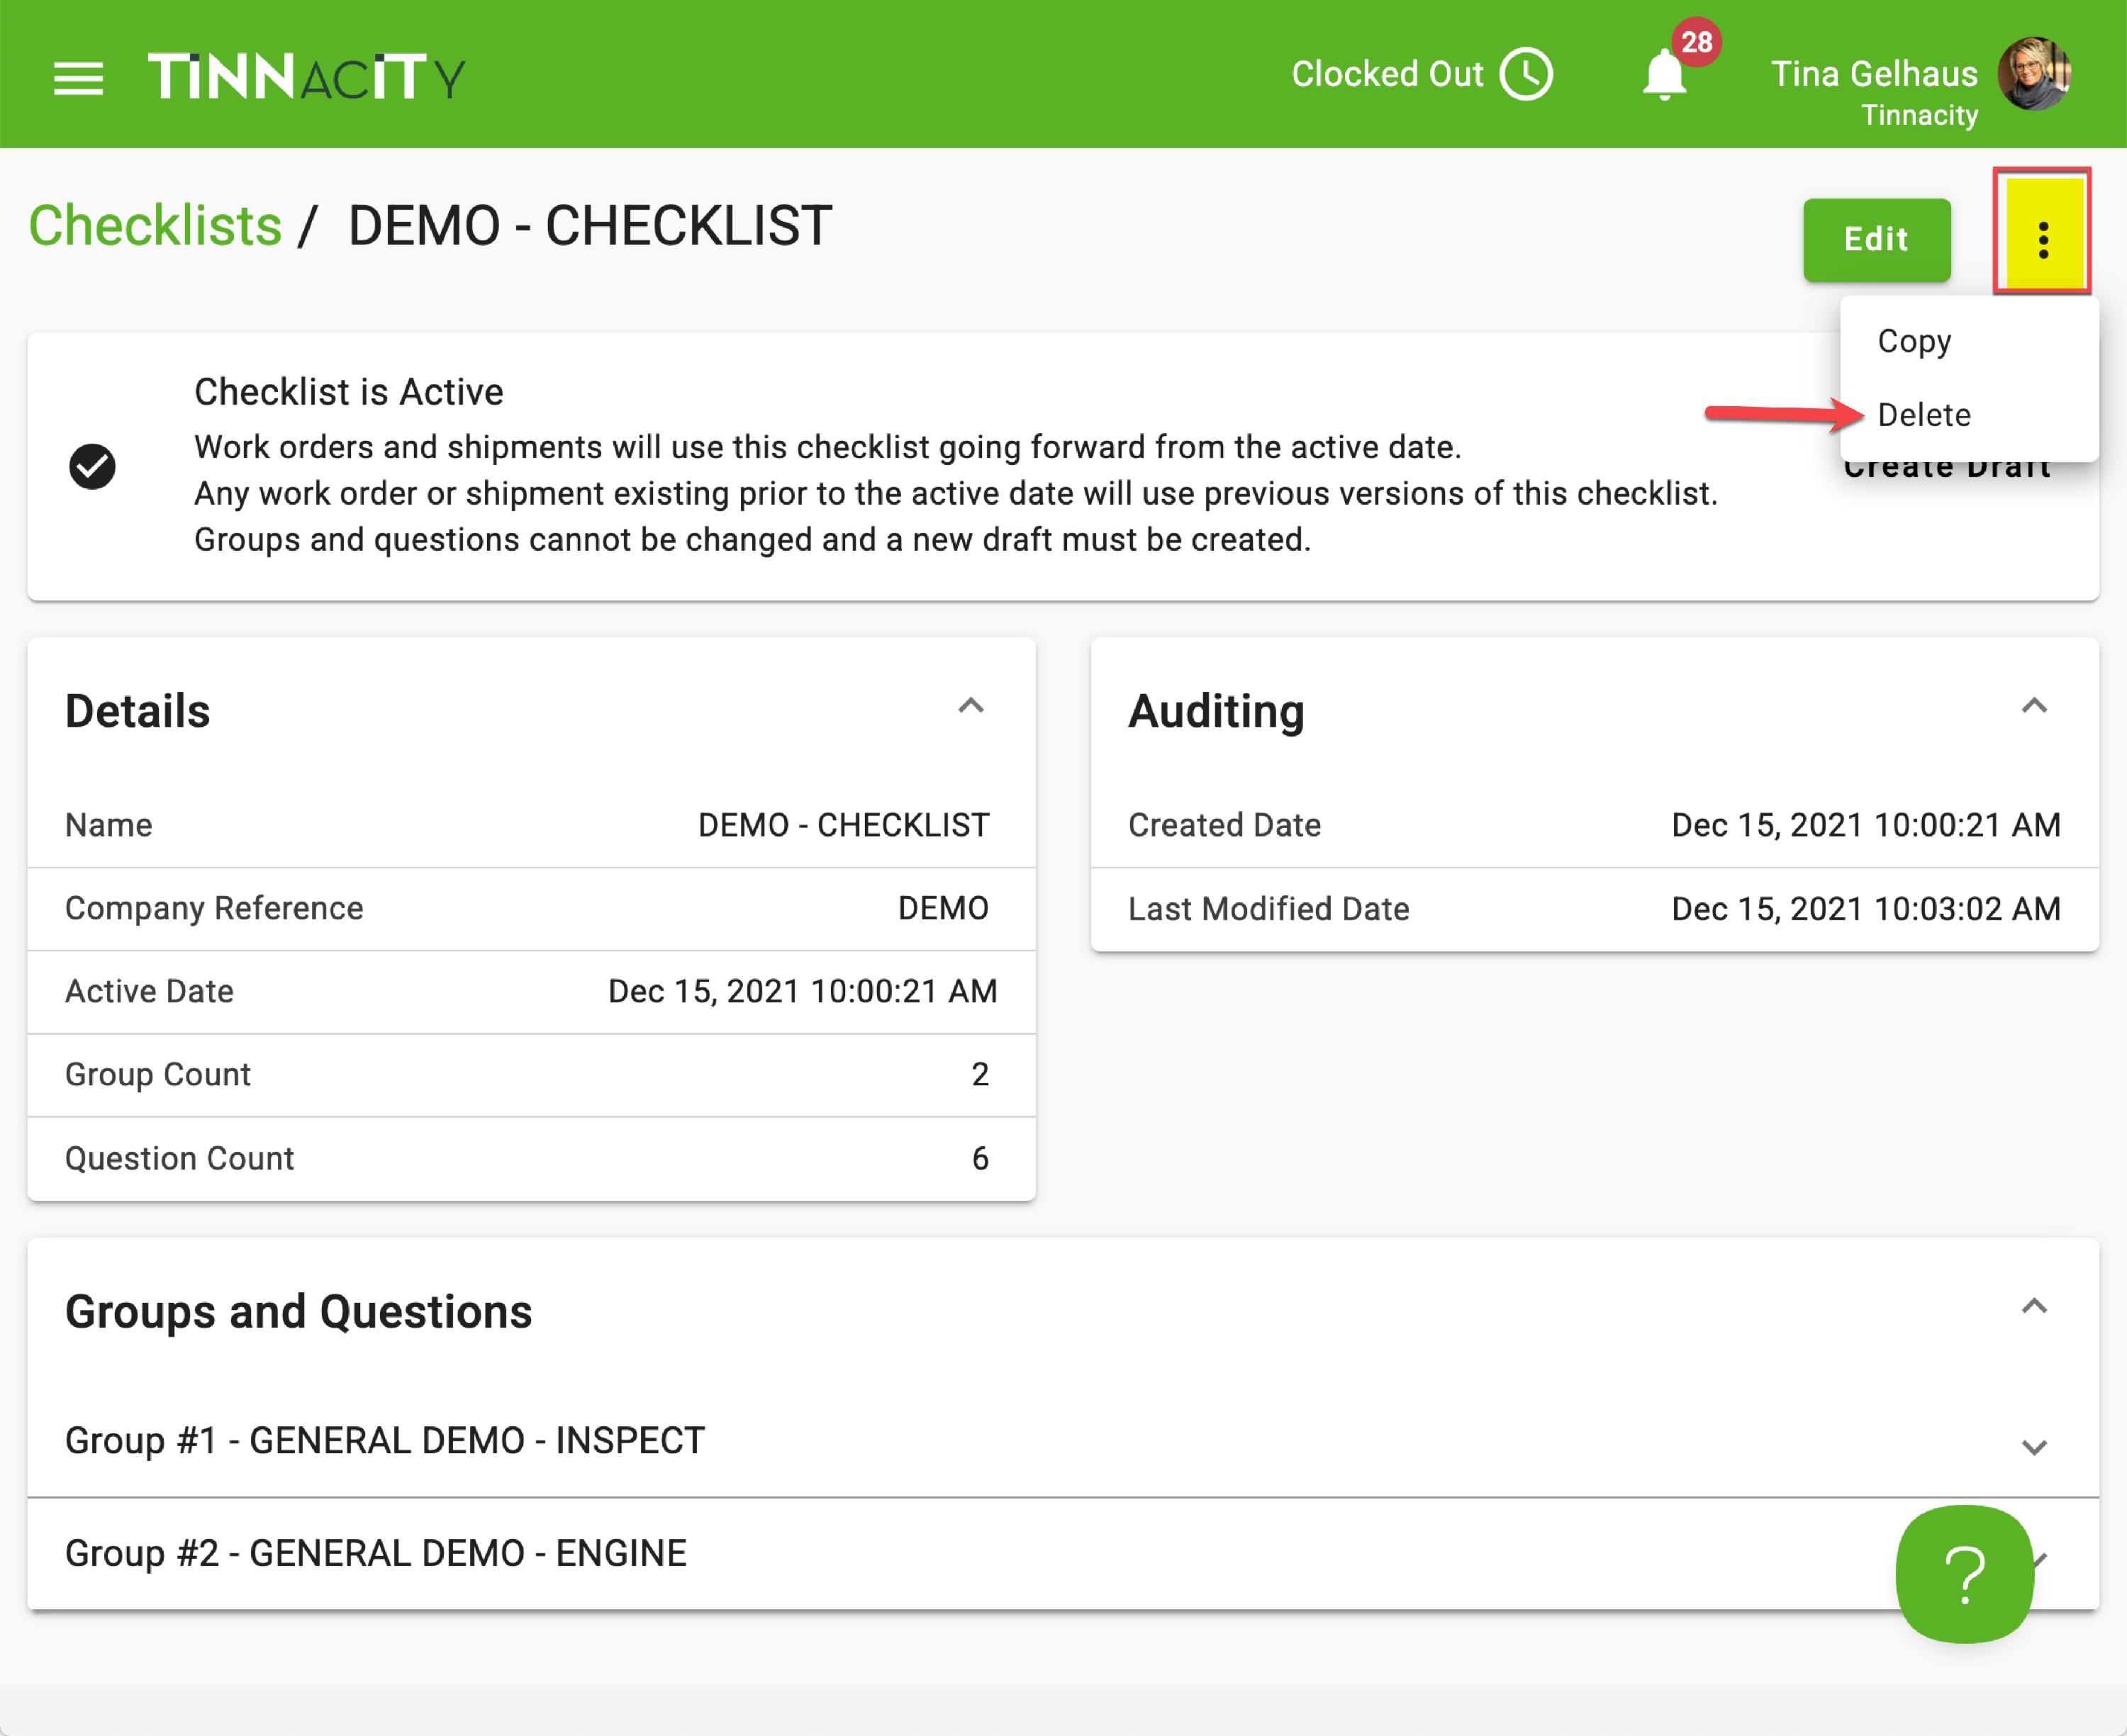
Delete a Checklist
Before you can delete a checklist, please confirm that it is not assigned to any model(s) within the Admin > Models section.
- Navigate to Admin > Models.
- Confirm that the checklist you wish to delete is not assigned to any models.
- Once unassigned, you may proceed with the deletion.
To delete a checklist, follow these steps:
- Navigate to Admin>Checklists, locate and select the relevant checklist.
-
While in the checklist details screen, click the three dots and select Delete.